
Natural Dyeing with Black Walnut Husks
I don’t have a ton of experience naturally dyeing with black walnut husks but I’ve experimented with them here and there. Here in the West, Black Walnut trees are not very common at all. I didn’t even know they could grow here until my neighbor told me she had a tree dumping black walnuts all over her yard. A few days later she brought me a couple boxes of husks! Shortly after that I discovered a big tree downtown. When I realized this species could indeed grow in the West I ordered a couple saplings from Strictly Medicinal. Sadly they didn’t make it through the winter but I’ll try again.

Black walnuts have a soft husk encasing the inner hard shell. The hard inner shells can be used as a dye but it’s the outer husks that are most potent. I’ve heard that they’re most strong when you use them fresh but I was too busy at harvest season to try that, so I spread them out on an old sheet and dried them for later use. From there I ground them into a fine powder.
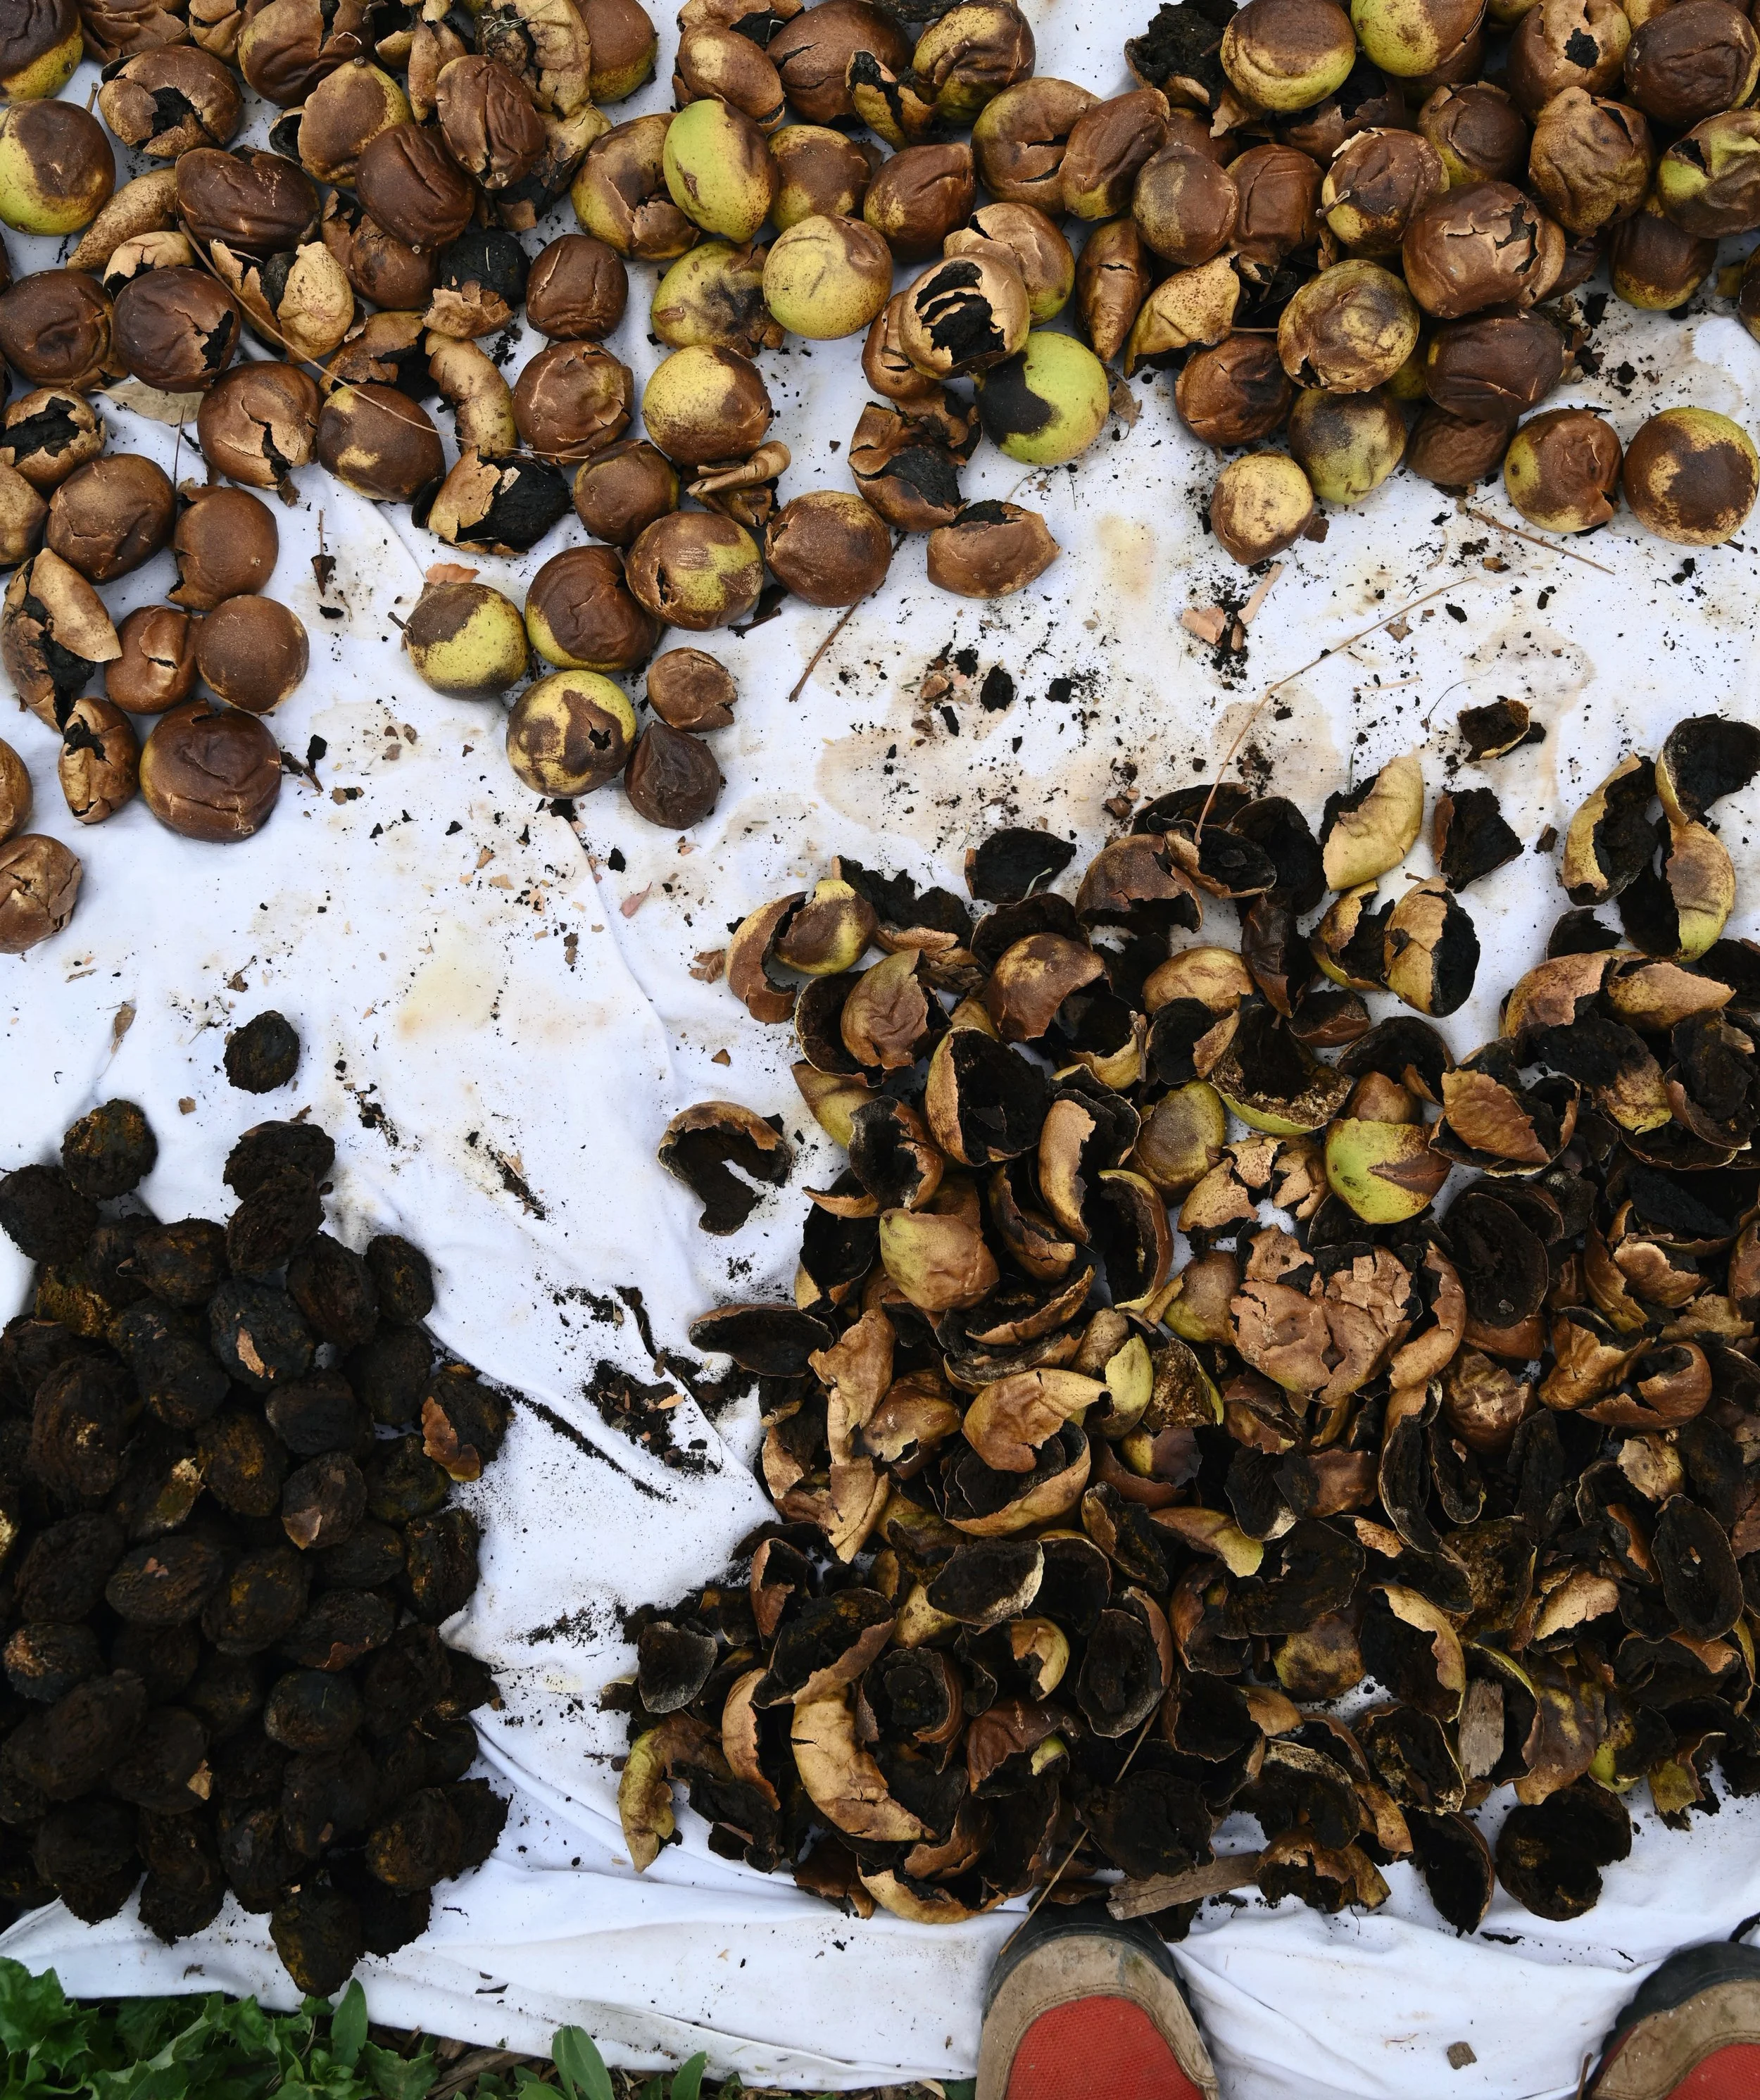
Above I’m working on removing the husks: whole nuts on the top, removed husks on the bottom right, and inner walnuts on the bottom left. I used a large pair of channel lock pliers to squeeze the husks off.

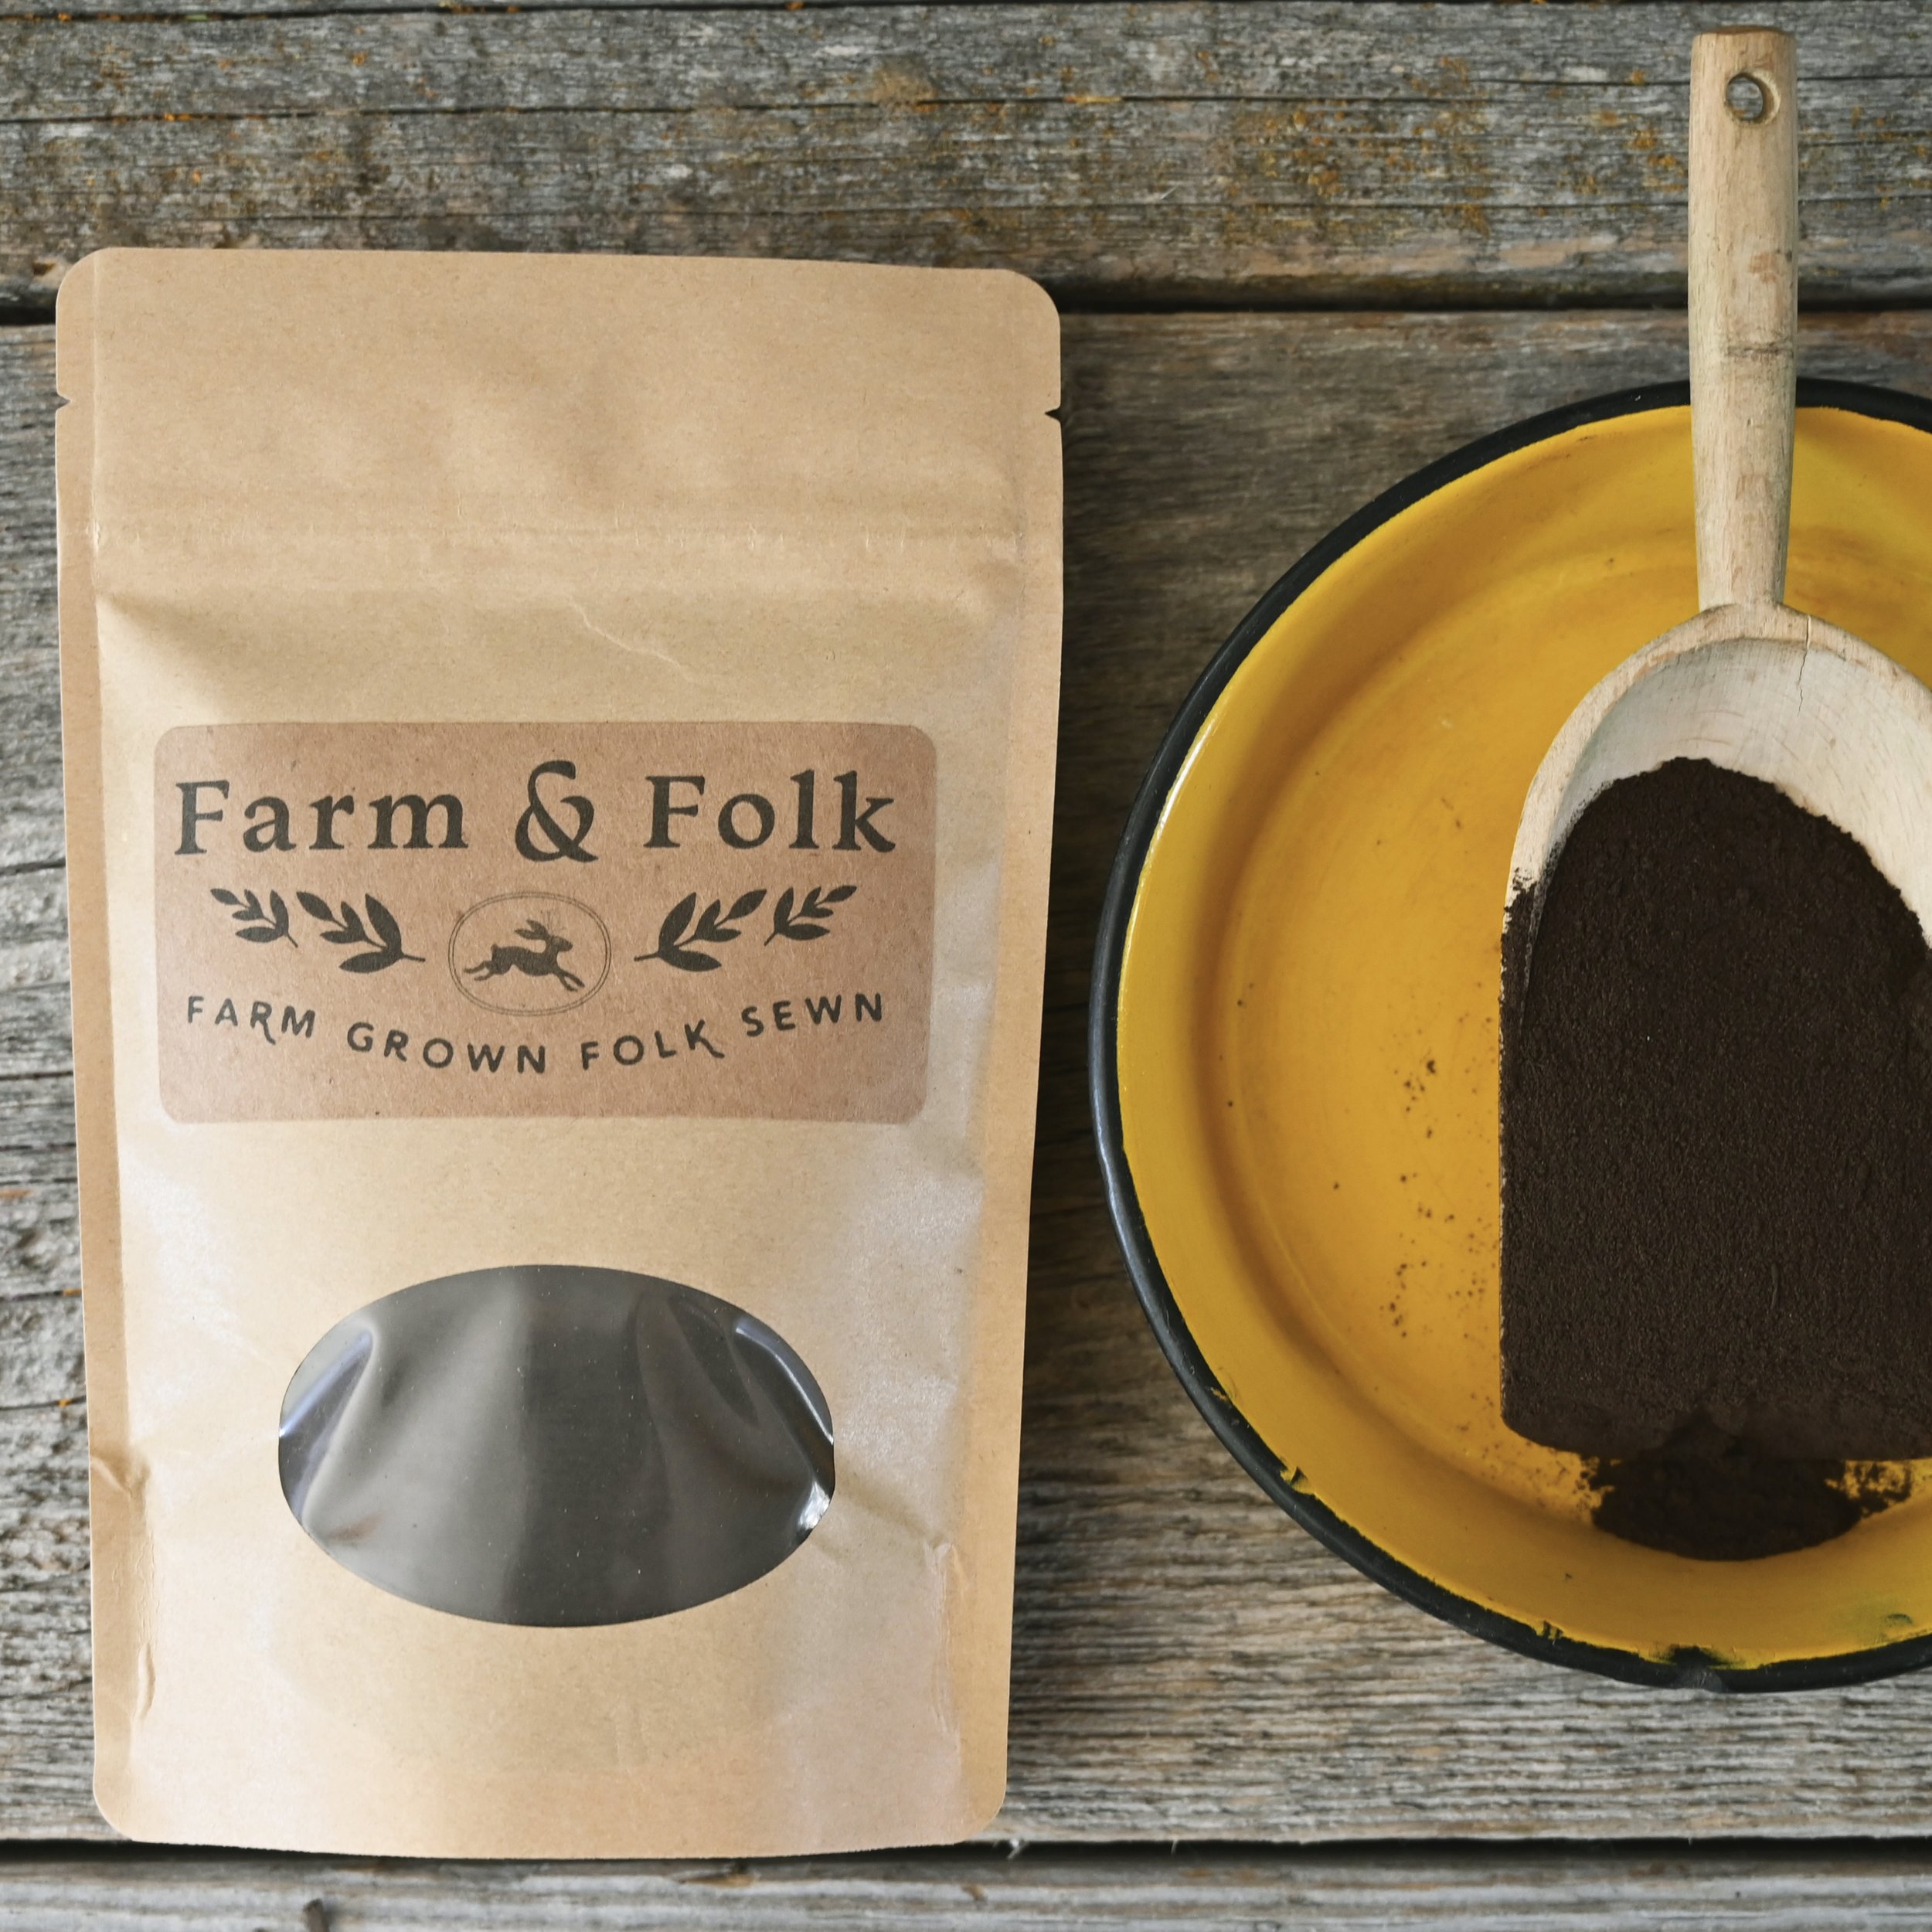
For this dye experiment I selected bleached linen cloth on the left and unbleached linen cloth on the right. I scoured the cloth, then soaked it in a black walnut husk tannin bath at 15% WOF for 4 hours. I set that tannin bath aside, then mordanted the cloth for 4 hours with alum and soda ash as explained in this post. I used my finely ground black walnut powder which you can see below. I have a few bags of this left in the shop. Fingers crossed I’ll be able to forage some more this fall.

After mordanting I rinsed the cloth once, then put it back into the reserved black walnut tannin bath. When I set up the tannin bath I only brought the temperature up to 120°F because high temperatures will damage tannin. Once mordanting is complete the results are permanent and high temperatures can by applied. I should mention that I didn’t add any additional walnut husk powder, I just slowly brought the leftover bath up to 180°F and held it there for an hour stirring every so often. Then I turned off the heat, made sure the fabric was fully submerged, and let it steep for several hours. By the end of the day I was happy with the colors so I rinsed the cloth just once and hung it on the line to dry.

After washing and drying these are the colors I achieved at 15% WOF: bleached linen on the left, unbleached linen in the center, and unbleached linen modified with ferrous sulfate at 3.5% WOF on the right. I was surprised by these results as I fully expected the unbleached linen to be a lot darker than the bleached linen. In the photo the piece modified with iron looks gray but is actually a warm smokey brown. The photo below is more accurate.

Black Walnut Hulls
(Juglans nigra)
Finely ground black walnut hulls locally foraged by Sara here in southwestern Colorado. This tannin rich dye yields a beautiful smokey tan color on cellulose fabrics when used at 10% WOF. When used at stronger WOF ratios black walnut hulls will yield darker grayish browns and for the darkest browns (almost black) you can shift the colors with iron.
Black walnut hulls can also be used to make a tannin bath before treating cellulose fiber with potassium aluminum sulfate (alum) or symplocos mordant. They impart a light tan color on the fibers which can be used as a foundation to dye on. In my book I share some in depth information about tannins in the context of natural dyes.
Resources:
Natural Dyeing with Black Walnut Hulls: a free blog post
Be sure to check out my book Farm & Folk Quilt Alchemy for more extensive natural dye information. It’s available wherever books are sold and I have signed copies available here. Formula 12: Black Walnut Browns can be found on page 70.