
Star in the Window Quilt Block Tutorial
Folk Sampler Sew Along Block 10
This traditional early 1900’s quilt block was originally named Burnham Square and then in the late 1970’s became more commonly referred to as Star in the Window. It’s an easy block composed of Half Square Triangles, Flying Geese, squares, and rectangles.

The finished size of this block is 12” (the unfinished size is 12 1/2”) because that’s what we’re working with in the Folk Sampler Sew Along. As with all quilt blocks you can change the size of the block by changing the size of the pieces within which is explained in this post. In the following instructions I will refer to the colors as the ones I chose for my block in the photo above: white, stripes, and olive green. As you plan your block, swap my colors for your personal choices. For the natural dyers, the dyes I used in my block are cutch and olive green.
Finished Block Size 12”
1/4” seam allowance
Cut List
For the HST’s:
Cut 2 white squares: 4”
Cut 2 stripe squares: 4”
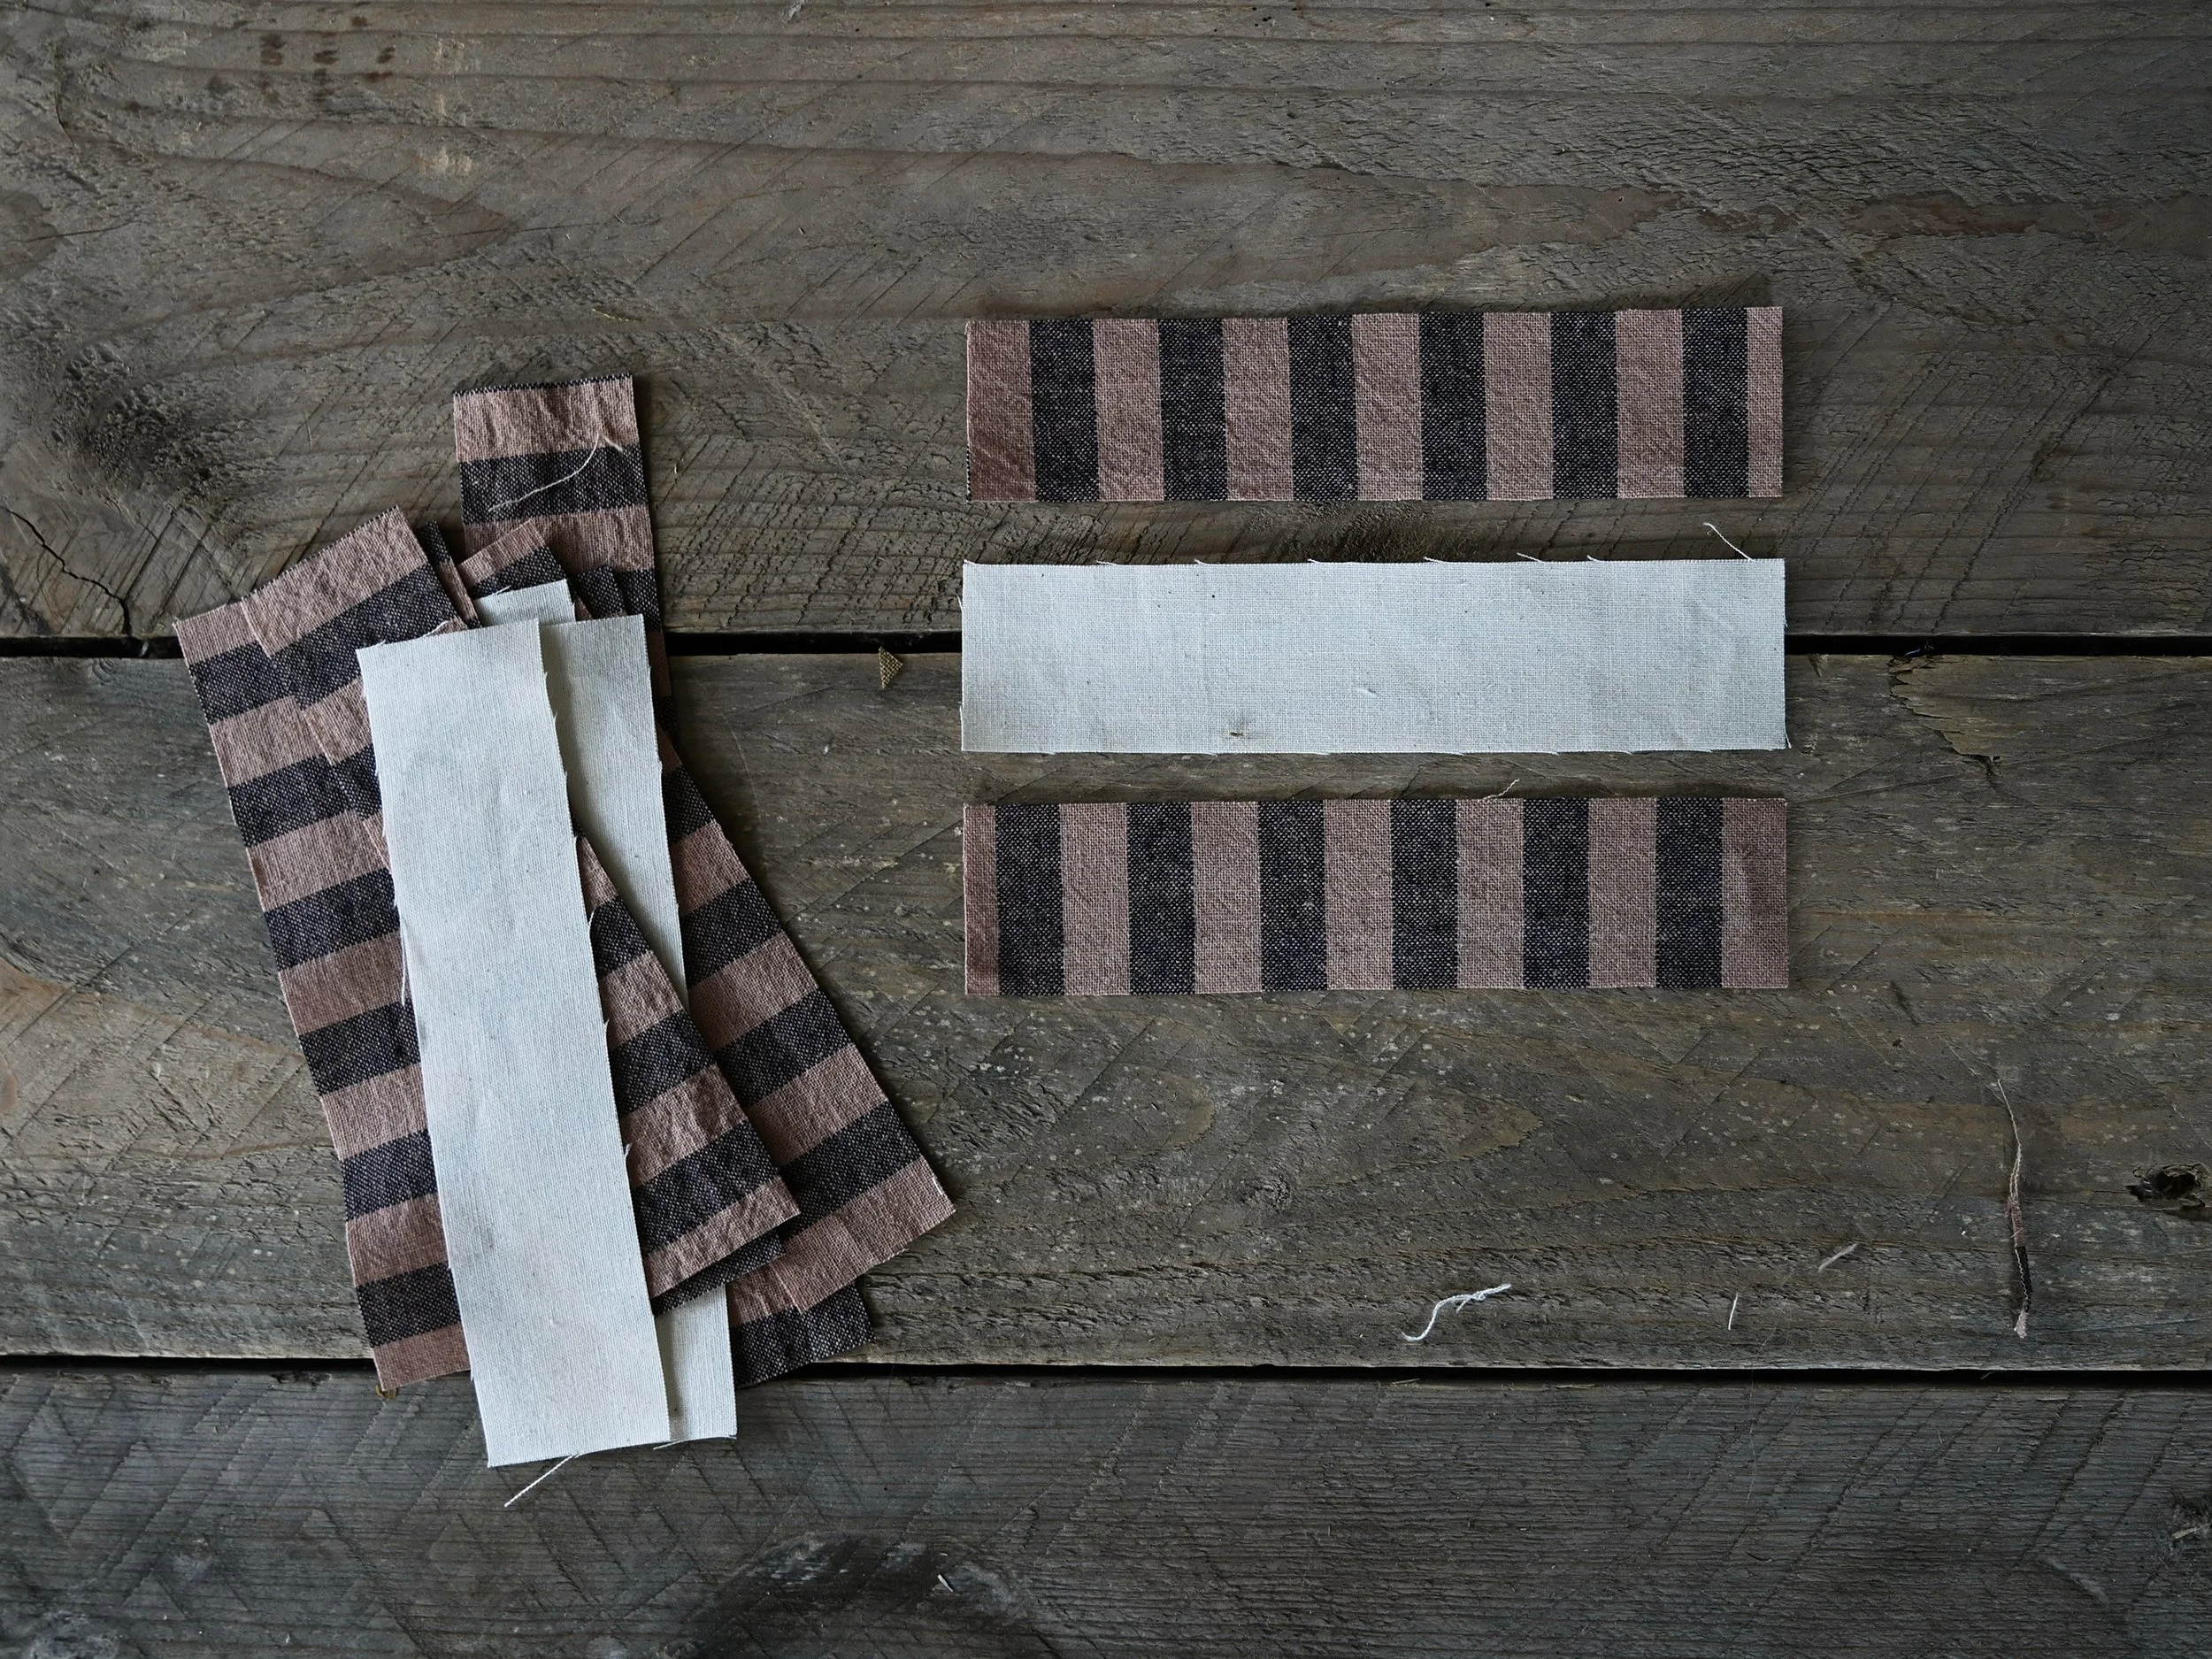
For the Rectangle Bar Blocks:
Cut 4 white rectangles: 1 1/2” x 6 1/2”
Cut 8 stripe rectangles: 1 1/2” x 6 1/2”
For the Inner Sawtooth Star Block:
Cut 4 white corner squares: 2”
Cut 1 white square for the center of the star: 3 1/2”
For the Flying Geese star points:
Cut 1 white square: 4 1/2”
Cut 4 olive squares: 2 3/4”

Make the Inner Sawtooth Star
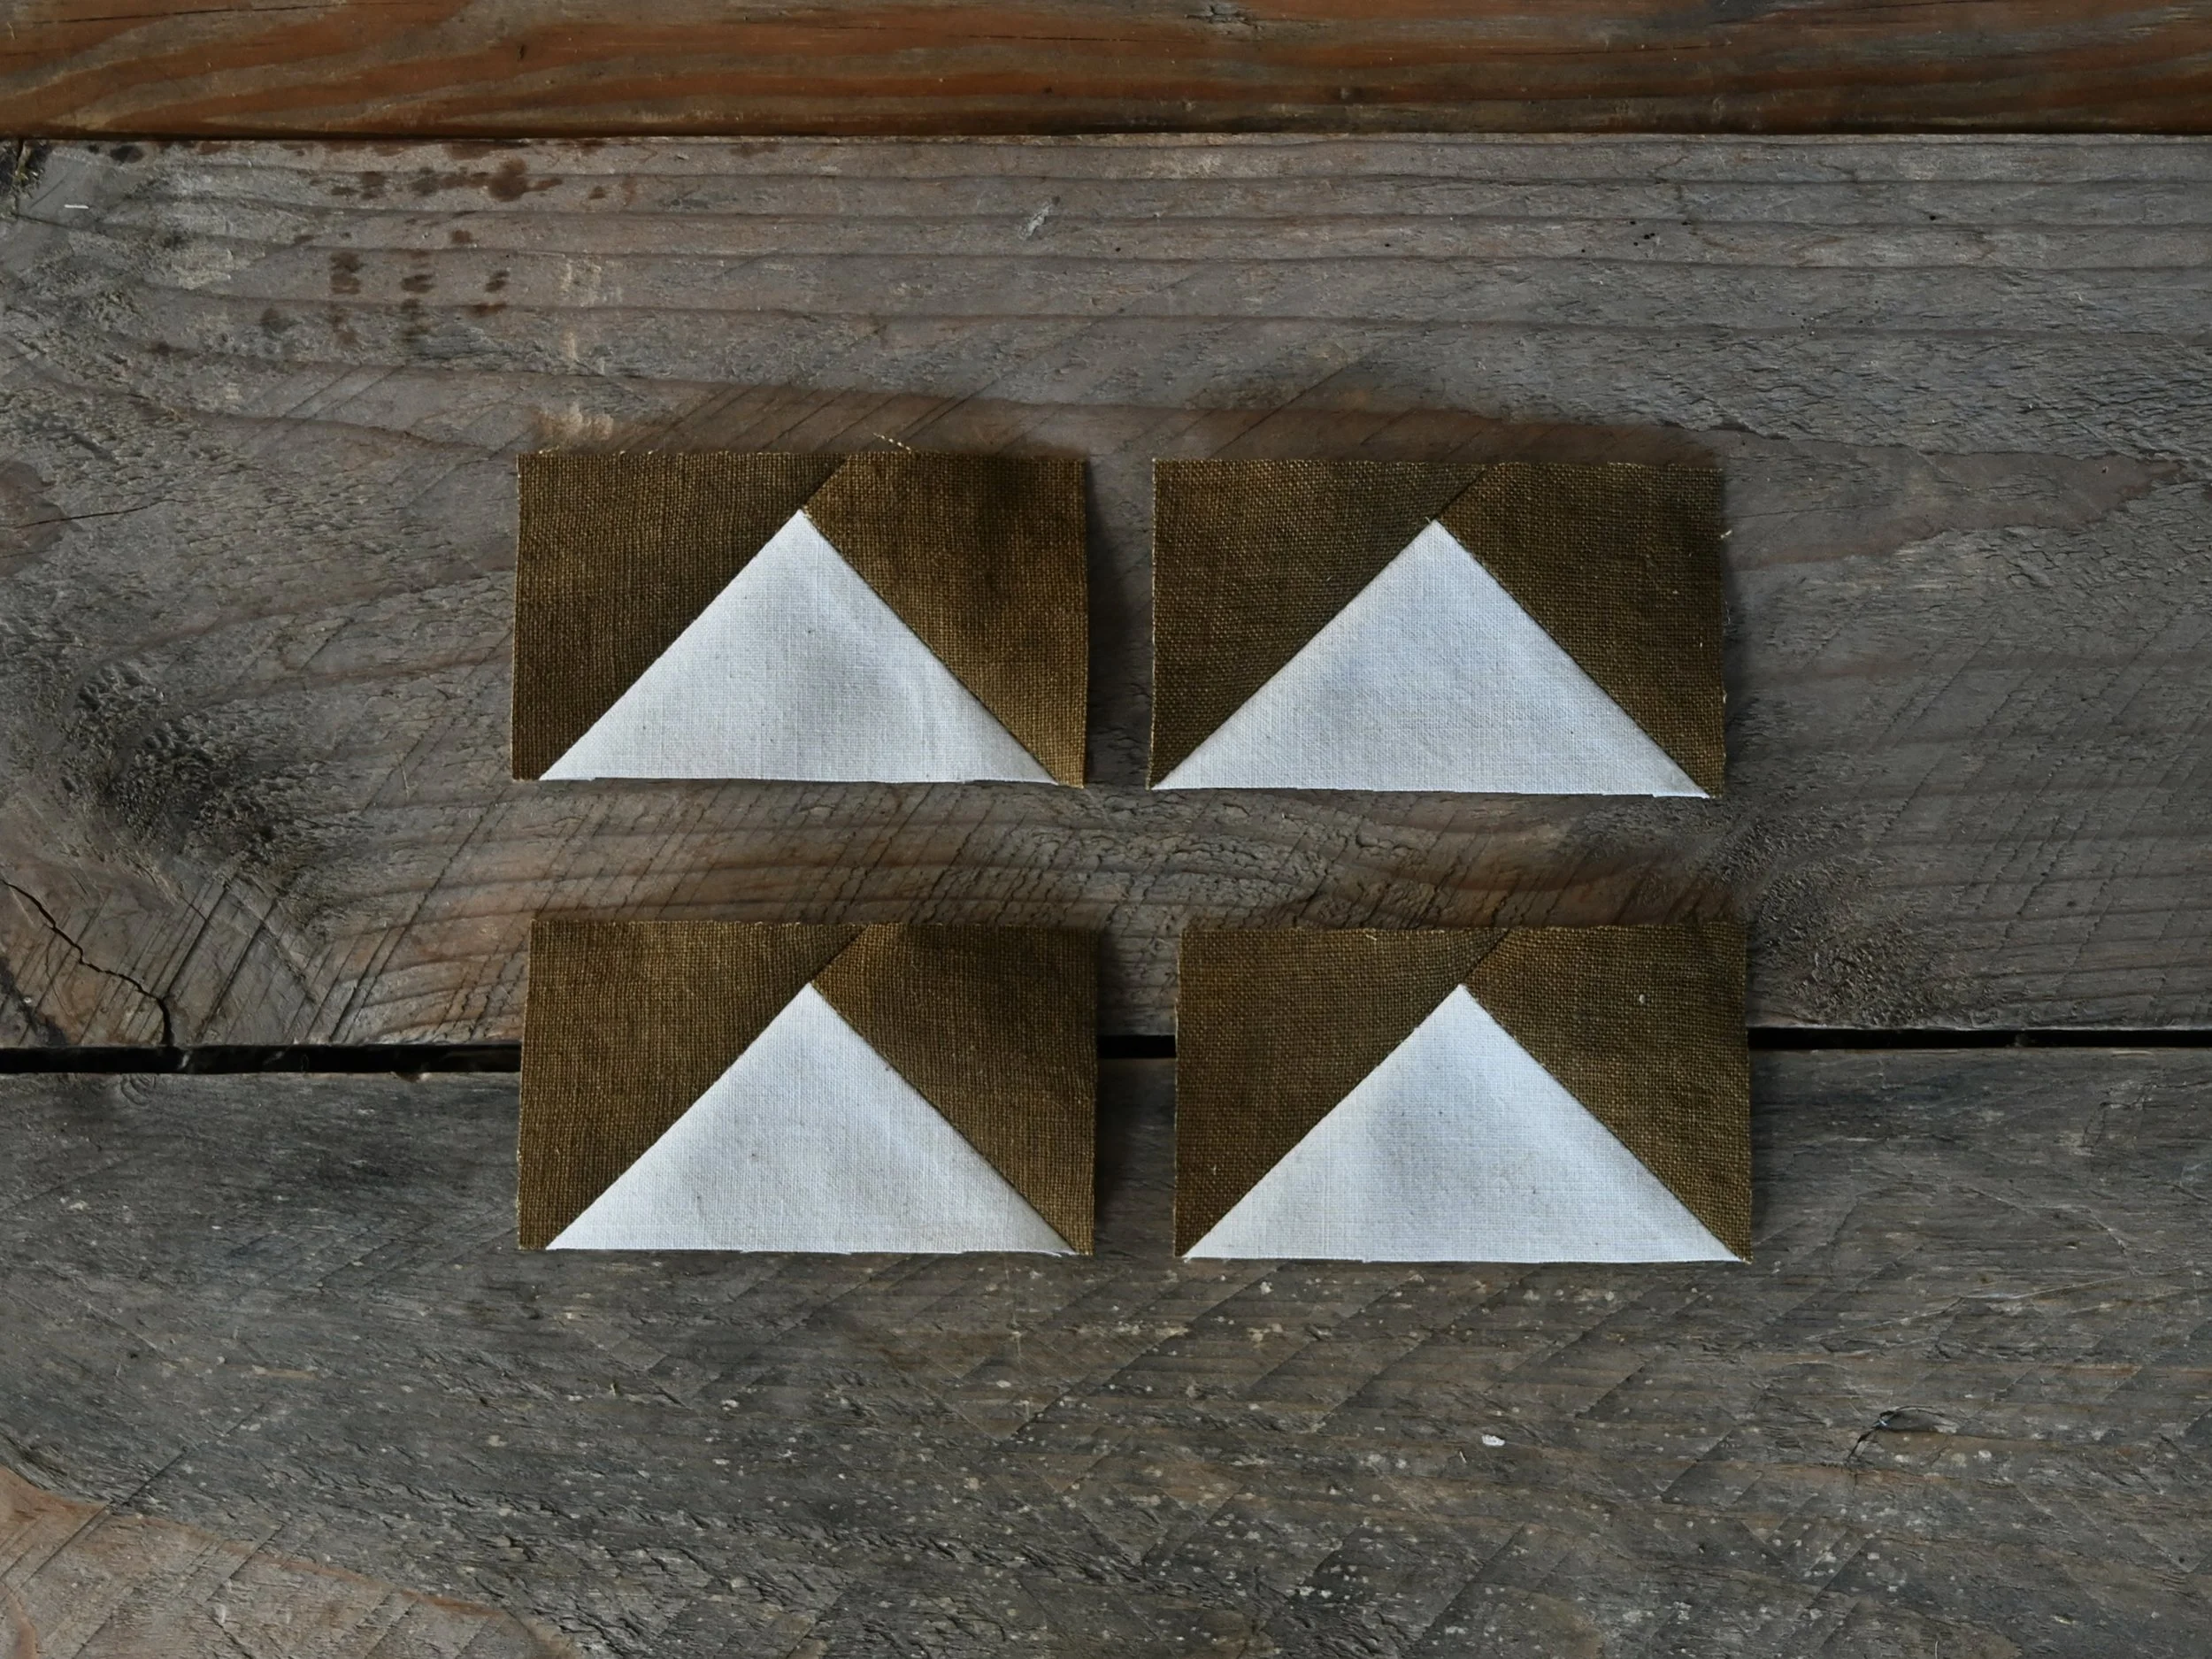
Gather the five squares you cut for the Flying Geese blocks. Use a rotary blade and quilter’s ruler to cut the larger (4 1/2”) white square from diagonal corner to corner twice, then cut the 4 smaller (2 3/4”) olive squares from diagonal corner to corner once as shown below. Head over to my Flying Geese tutorial with these pieces and make 4 Flying Geese.

When you get to the section of the tutorial where you trim the geese, trim them to 2” x 3 1/2”.
Gather the 4 trimmed Flying Geese along with the remaining squares you cut for the inner Sawtooth Star block and arrange them on your work surface as shown below.
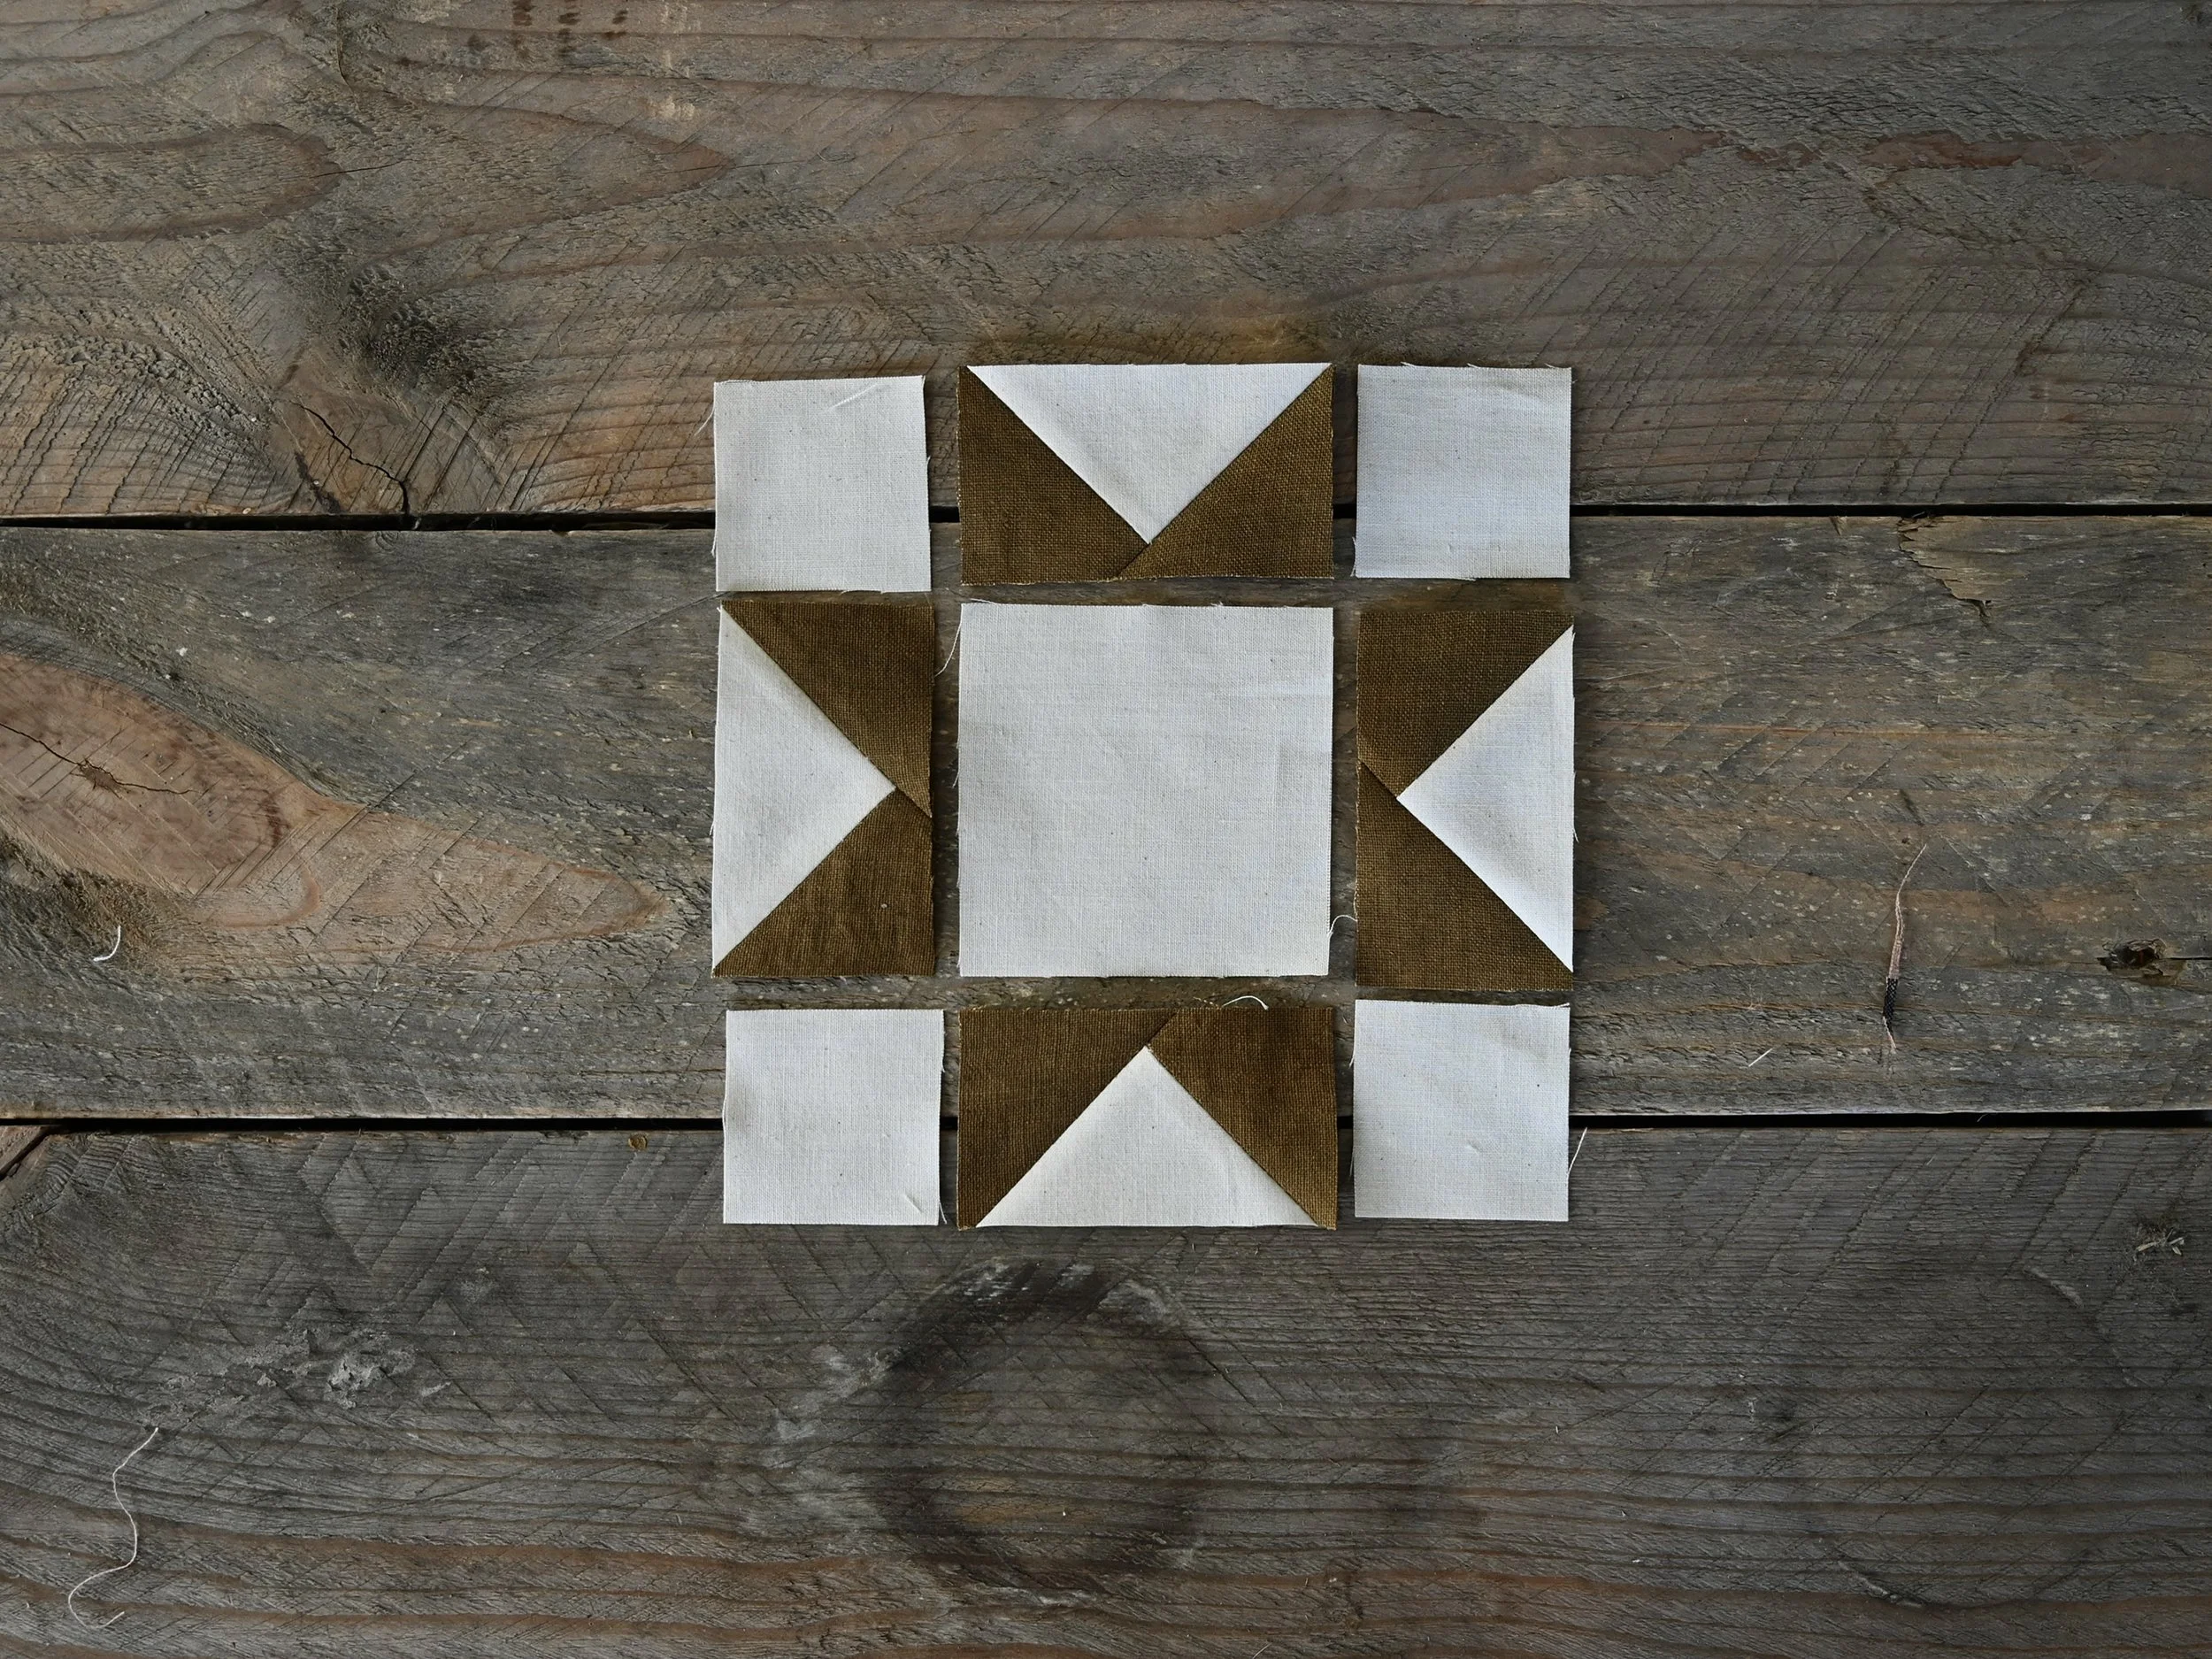
Sew the pieces into 3 horizontal rows as shown below. Press the seams open or to the side if you prefer.
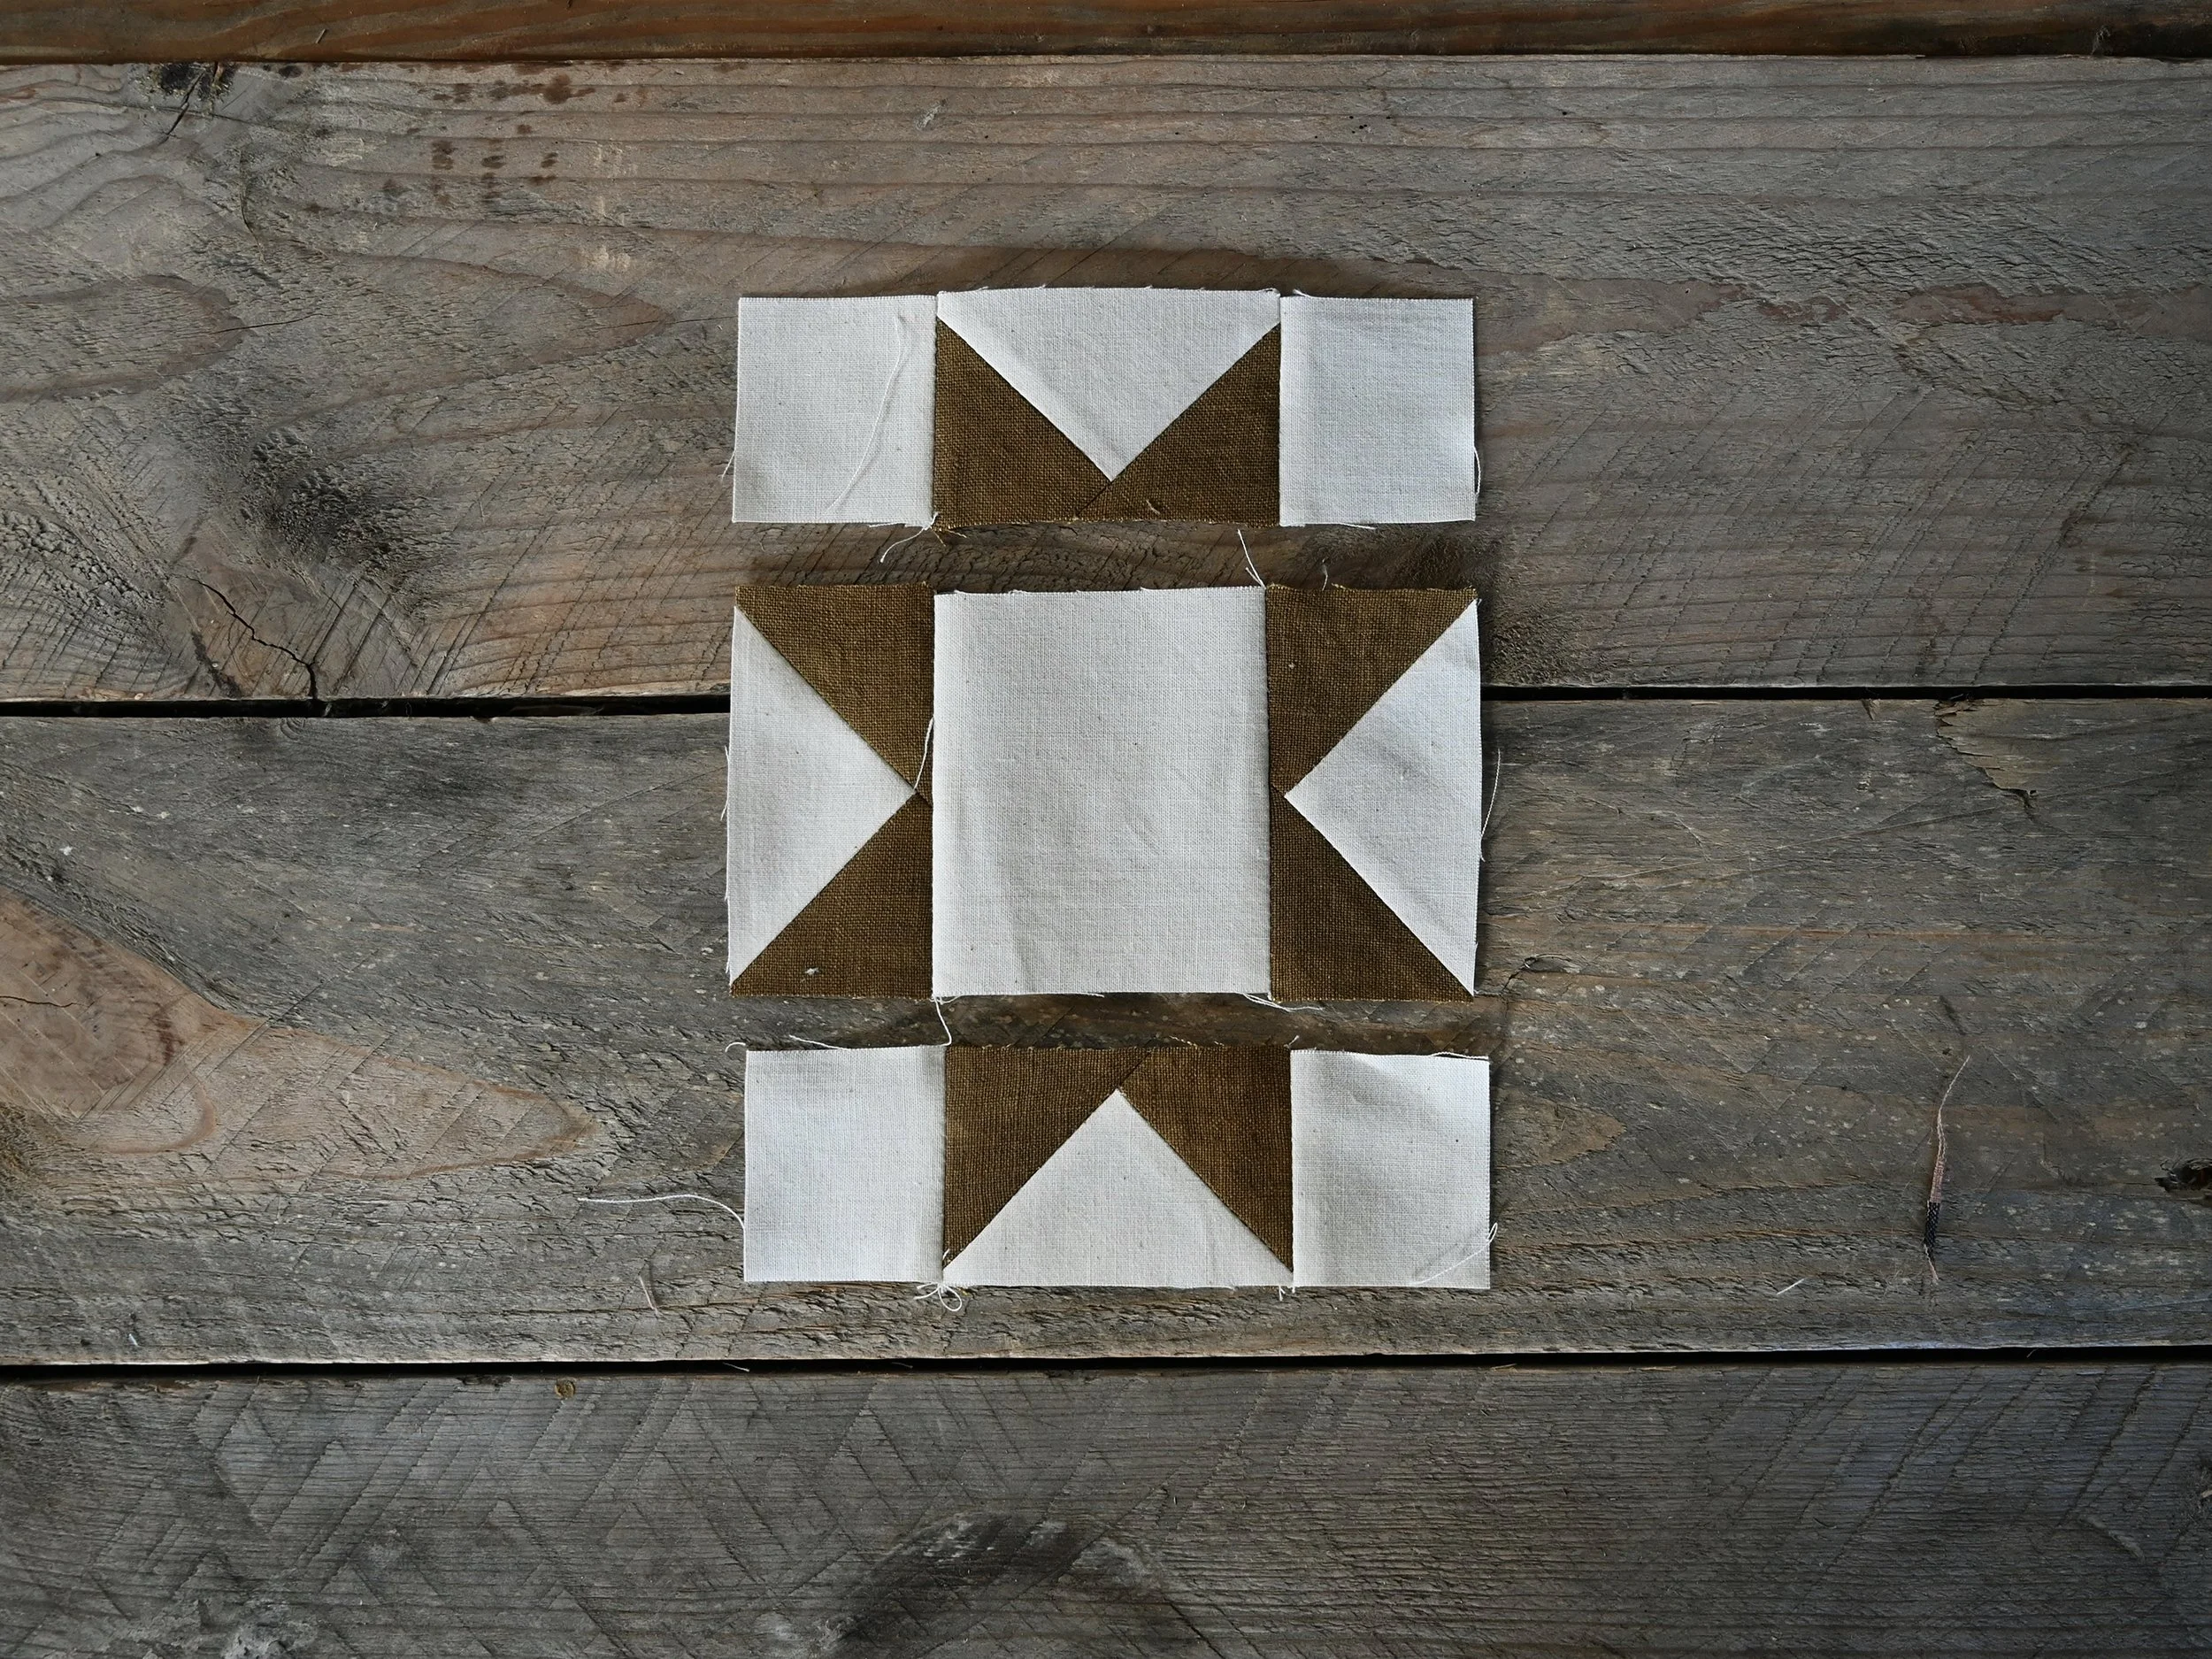
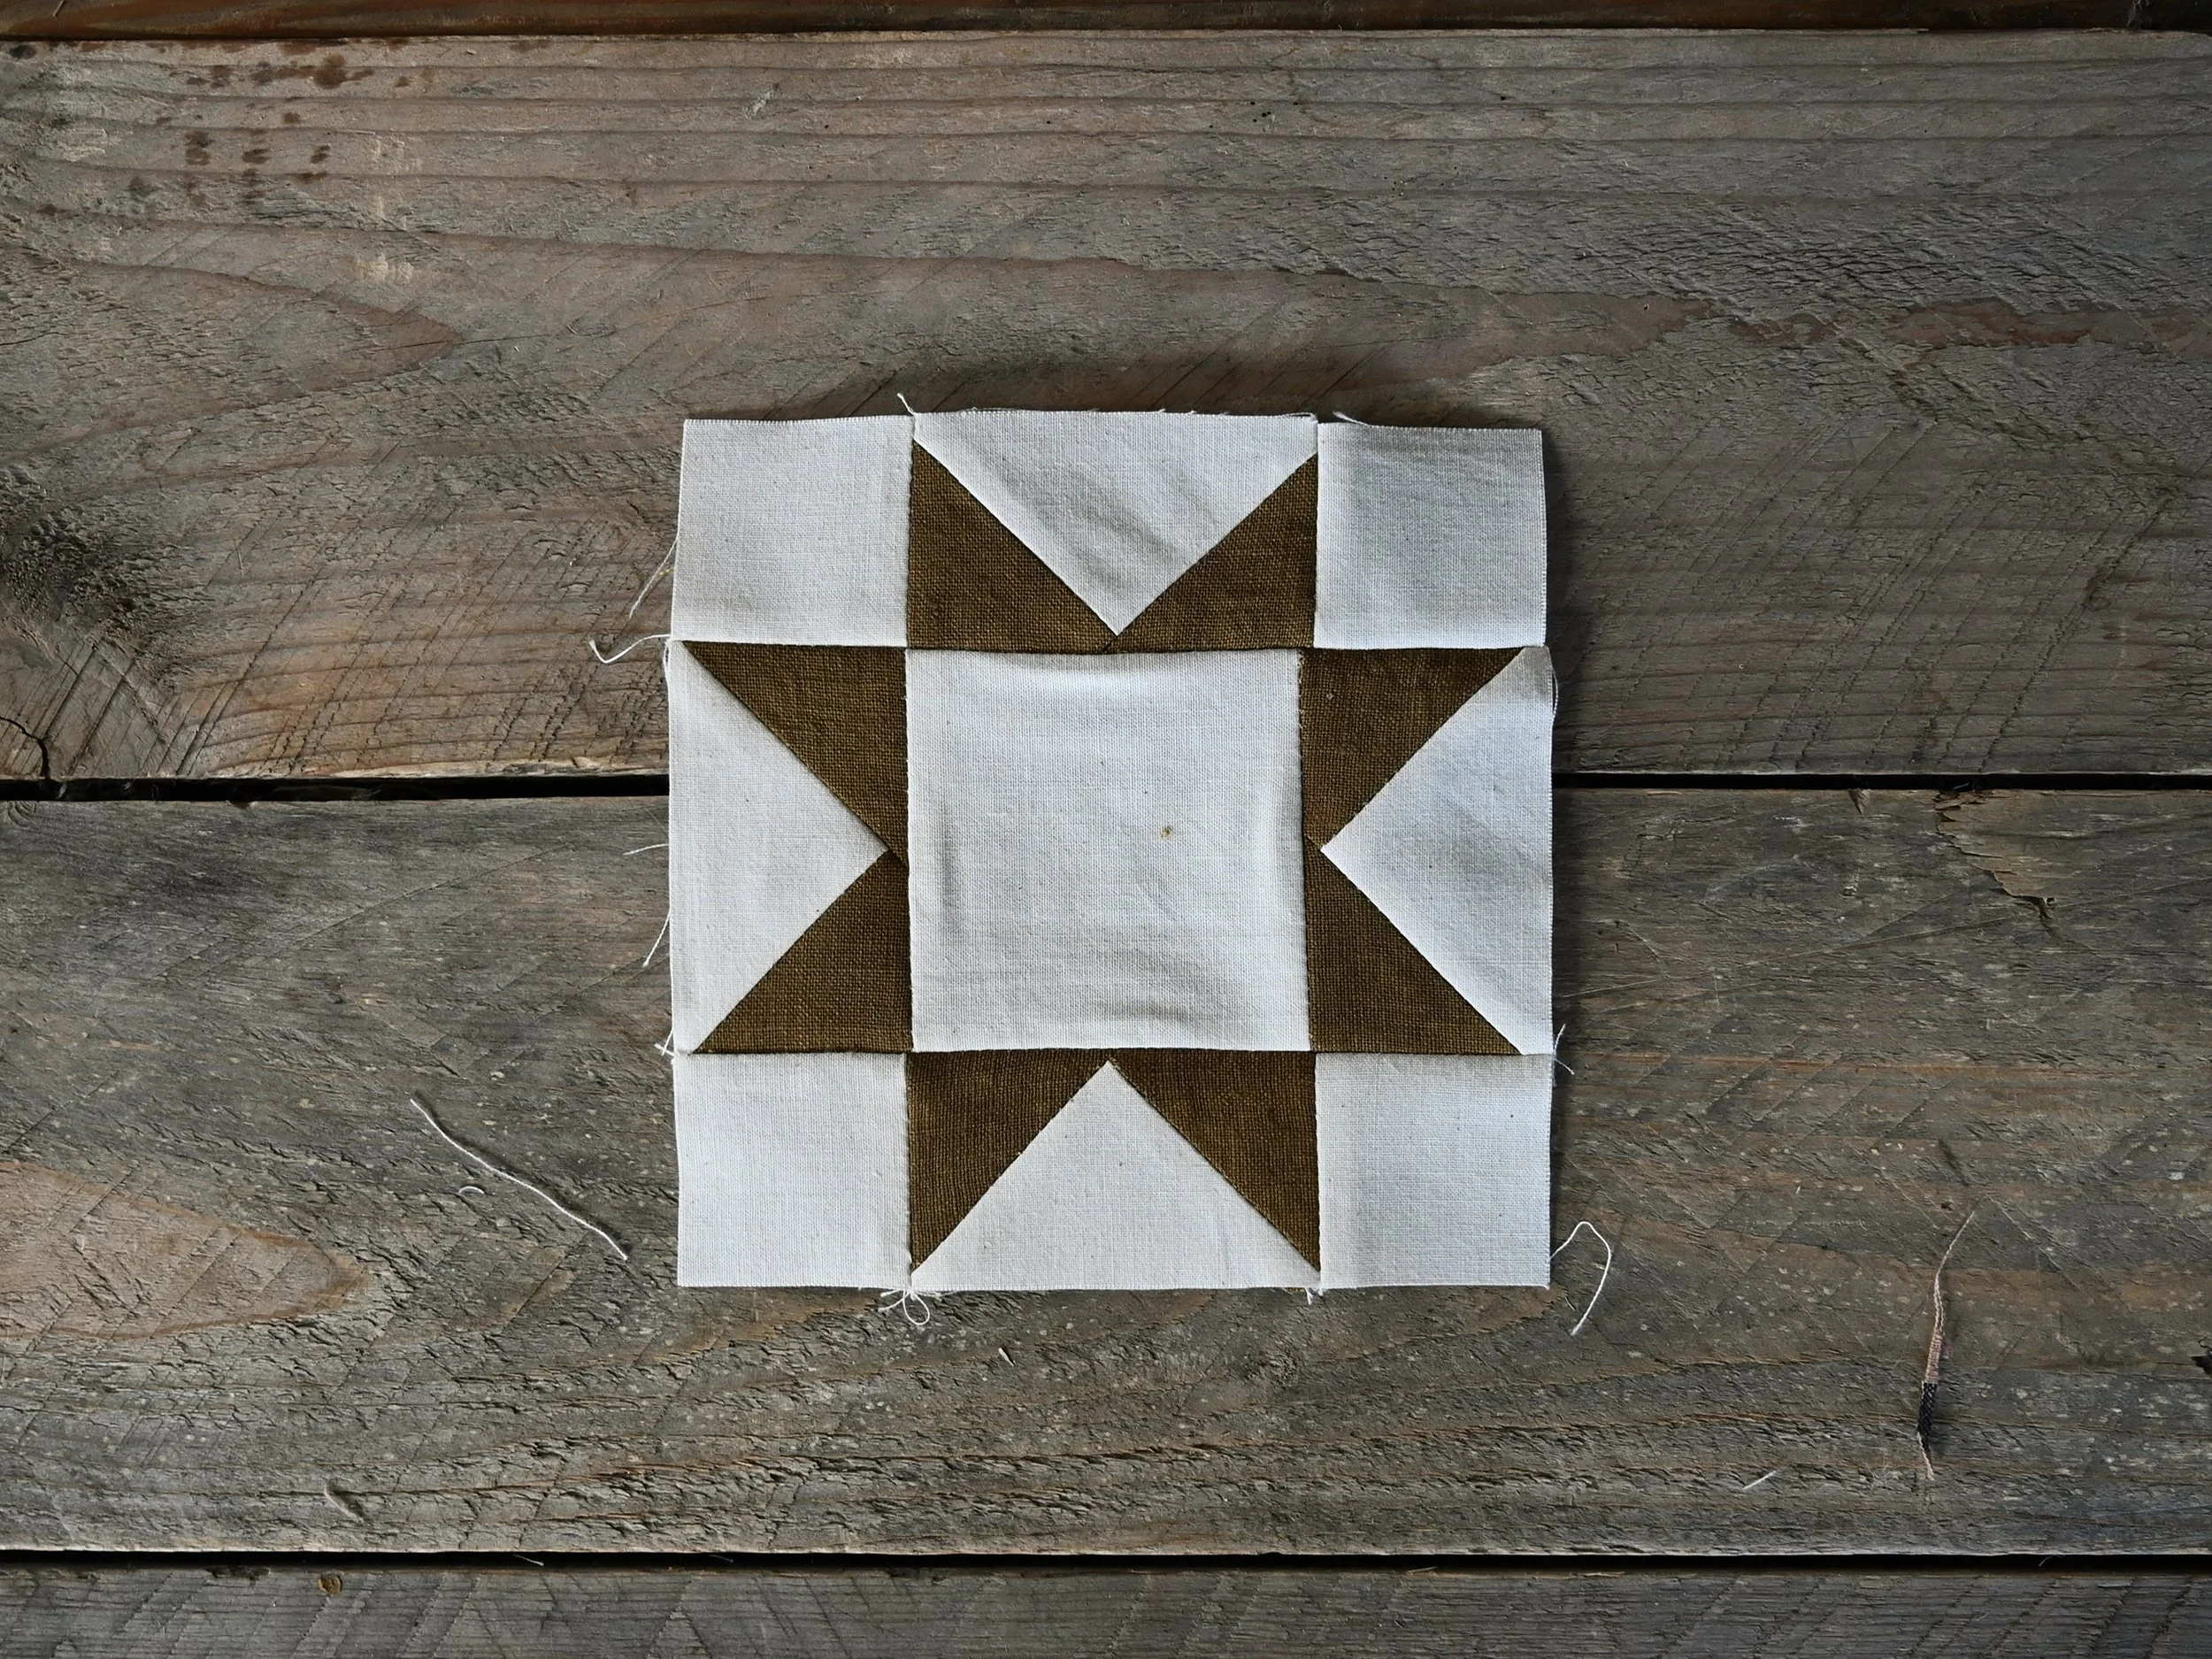
Sew the rows together being sure to match the seams by pinning. Press the seams open or to the side if you prefer.
Make the HST’s
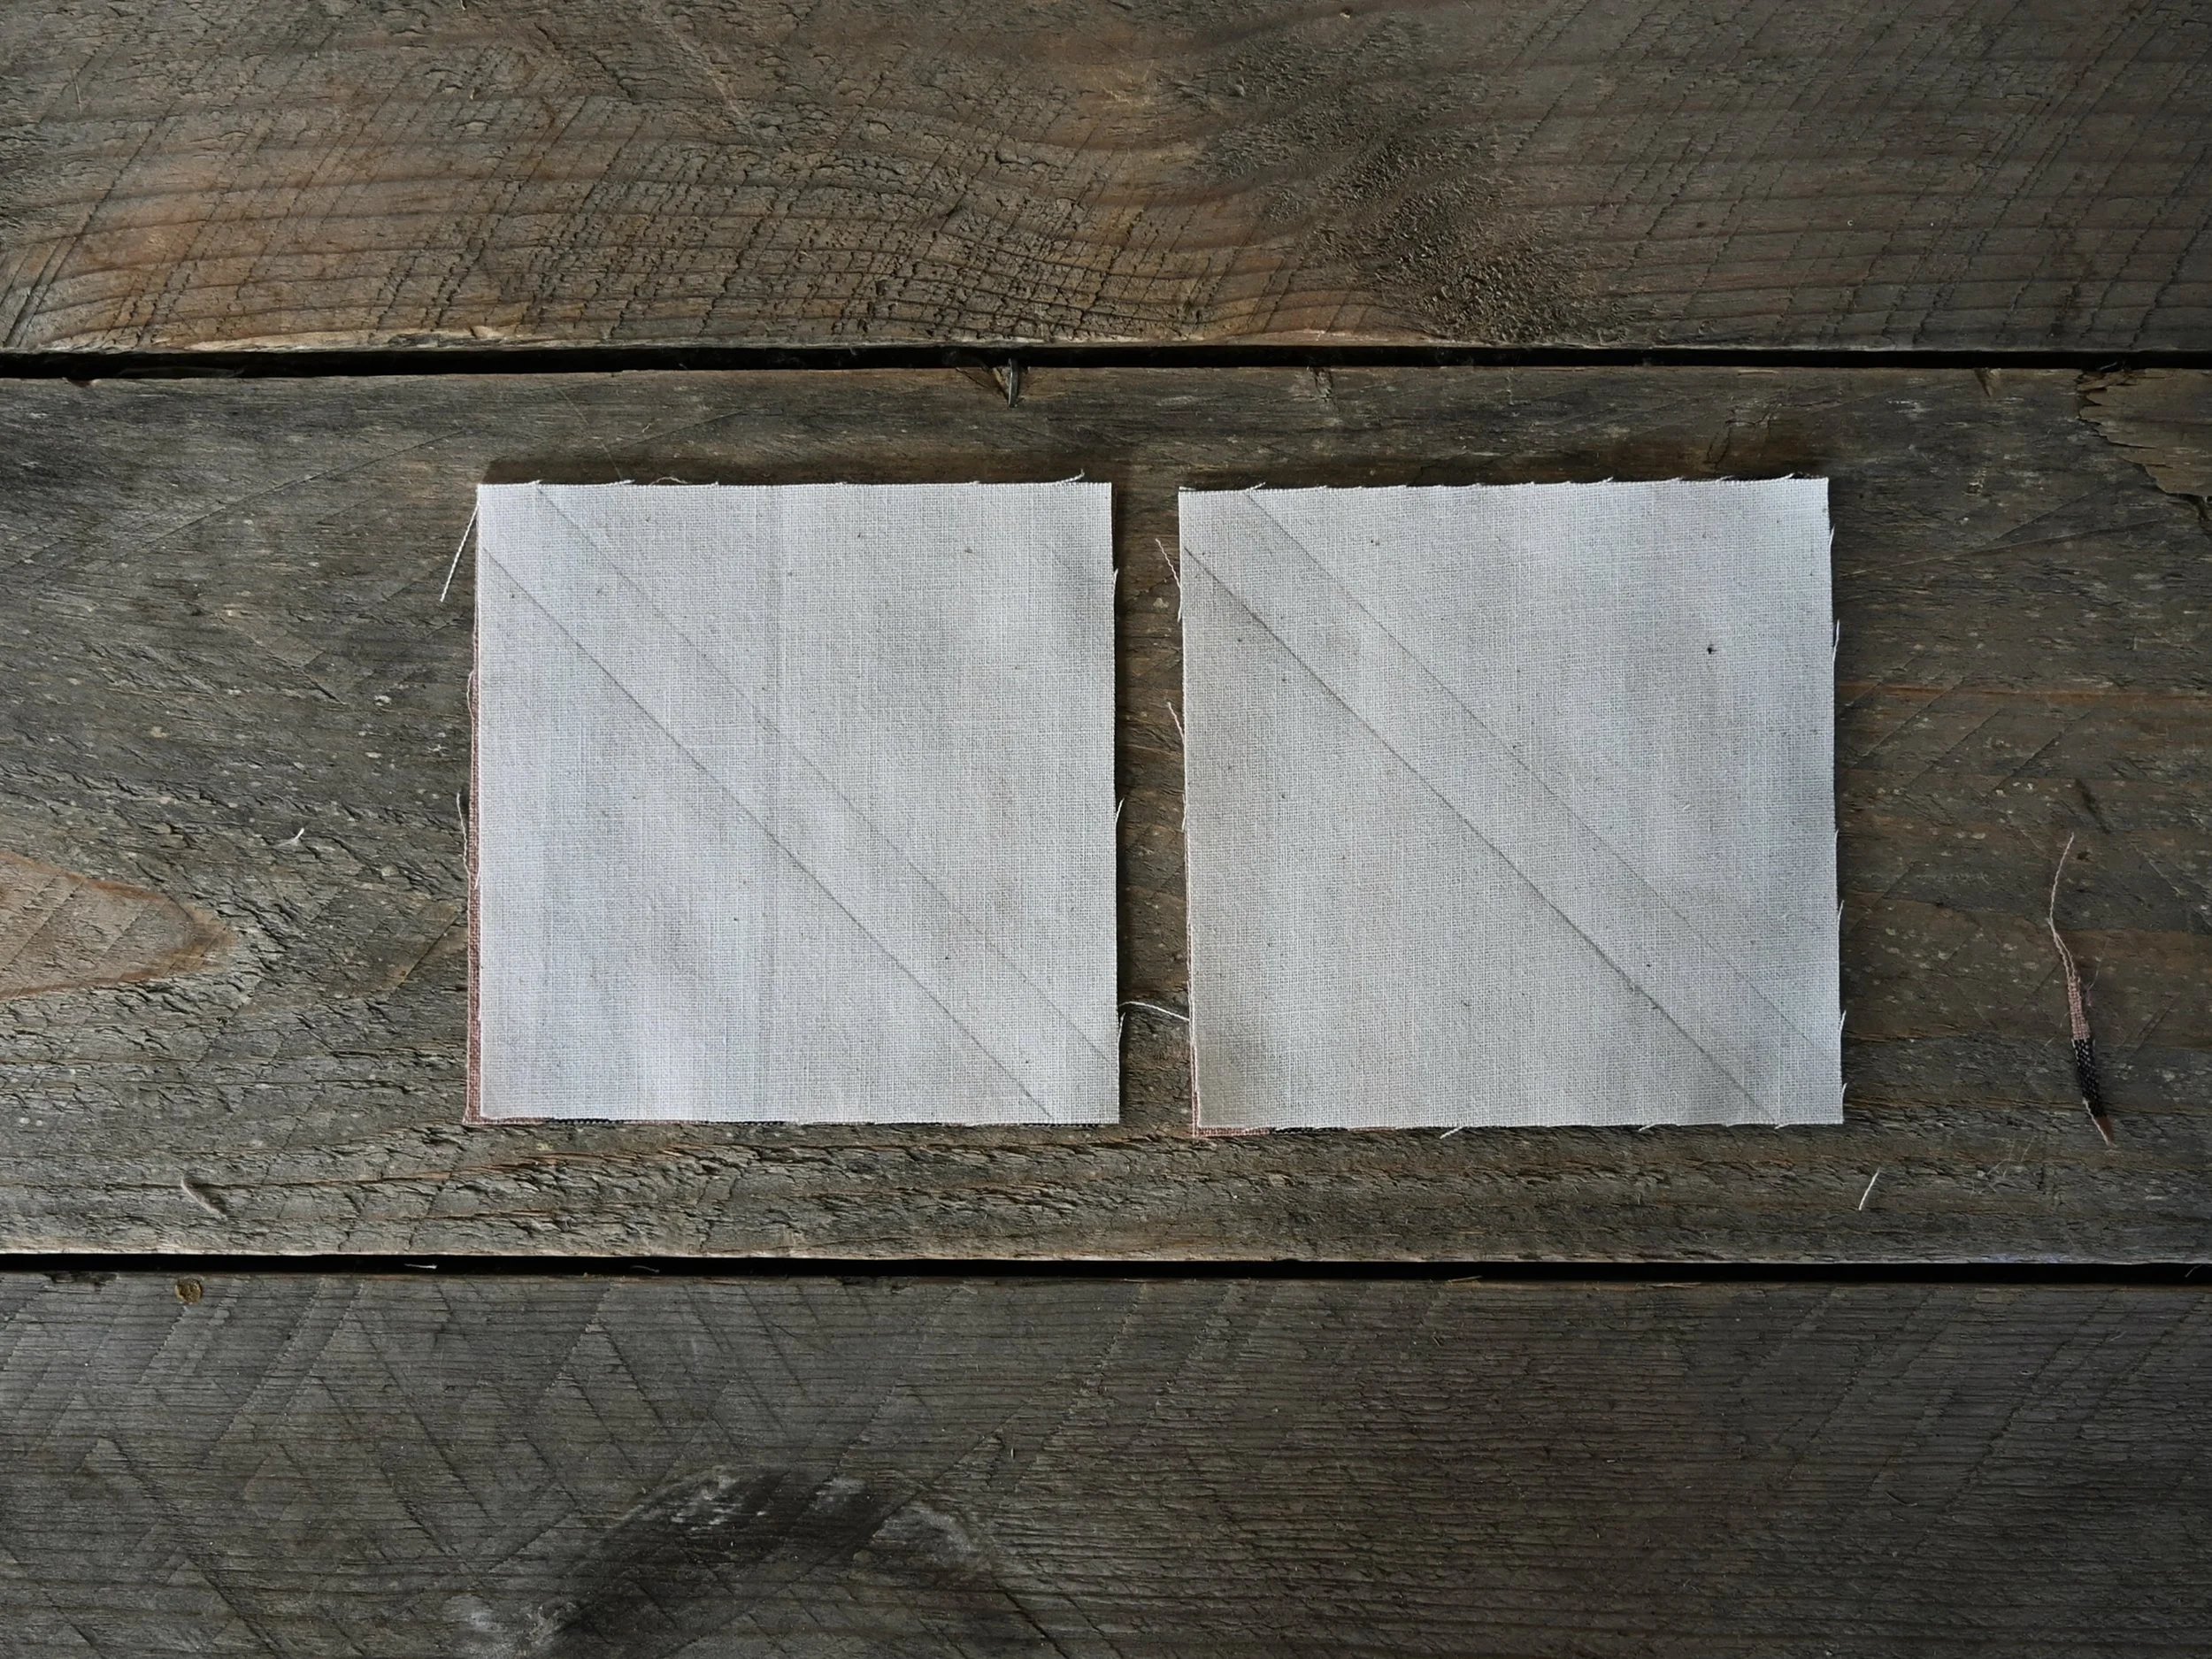
Gather the 2 white and 1 striped 4” squares you cut for the HST’s.

Place the striped squares on your work surface, then place a white square on top of each striped square and use a quarter inch seam marker and a mechanical pencil to mark diagonal lines as shown below. I explain how to mark the lines without a quarter inch seam marker in my HST tutorial if you don’t have one.
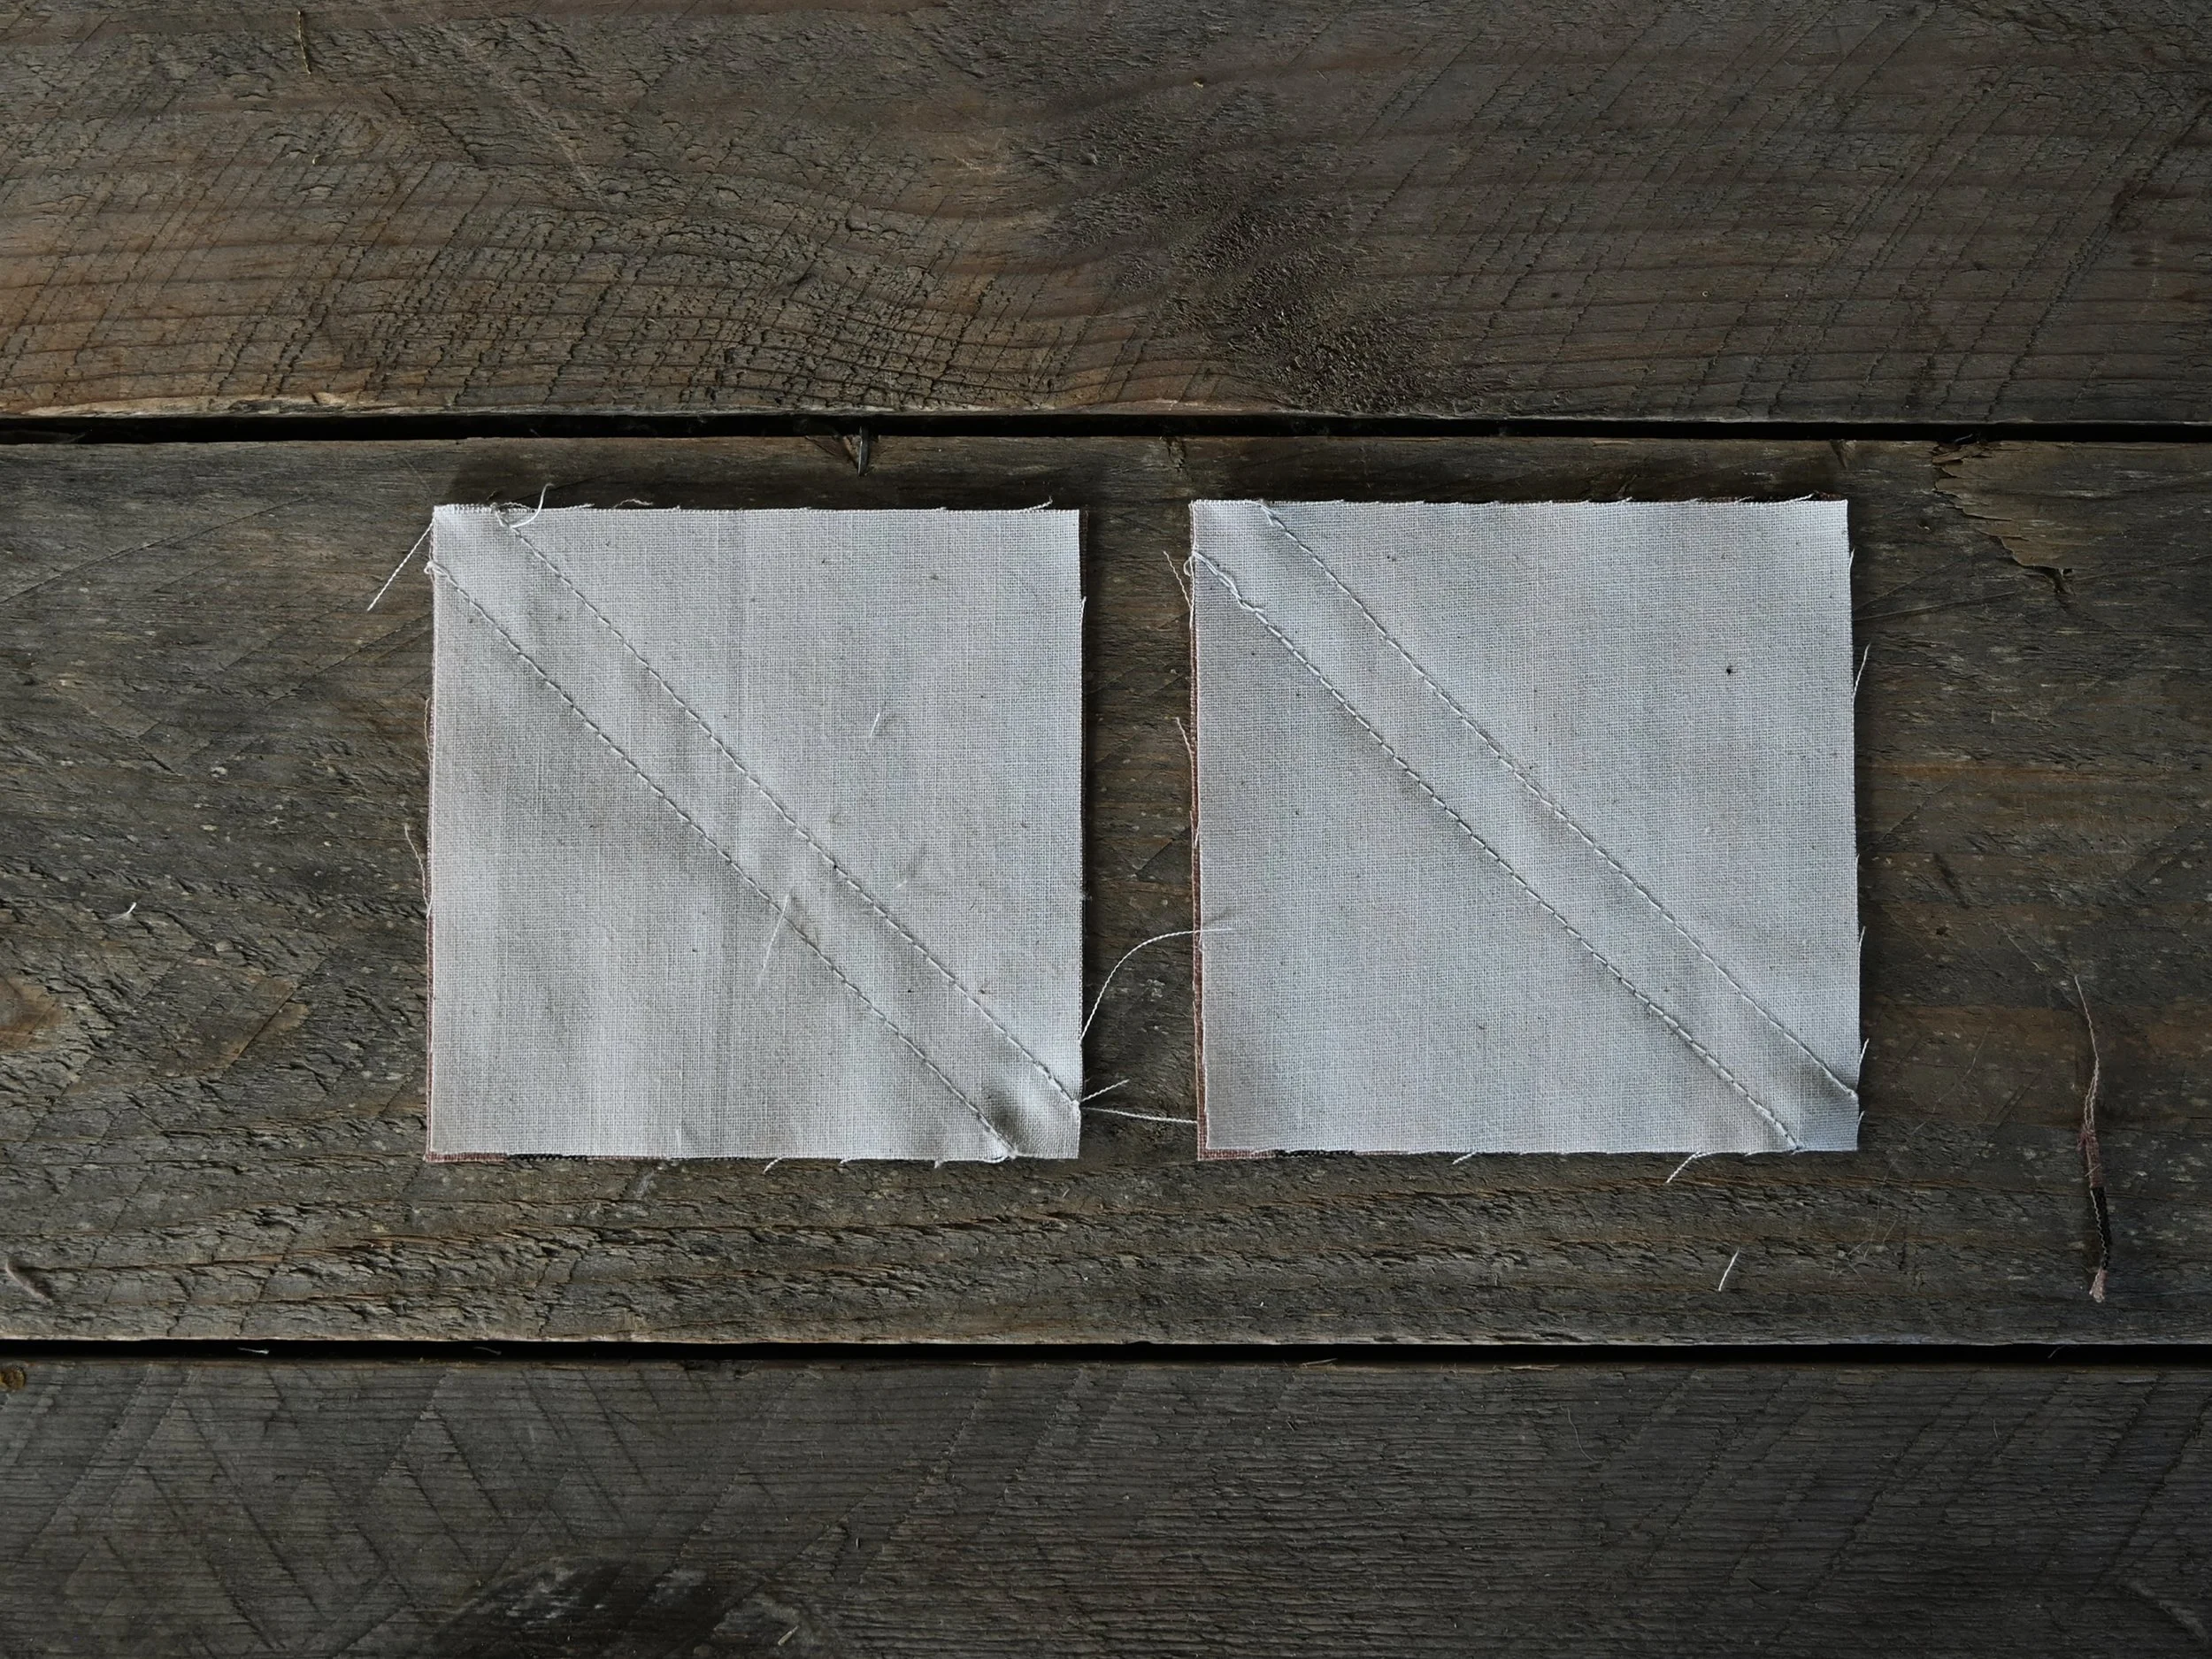
Sew along the marked lines.
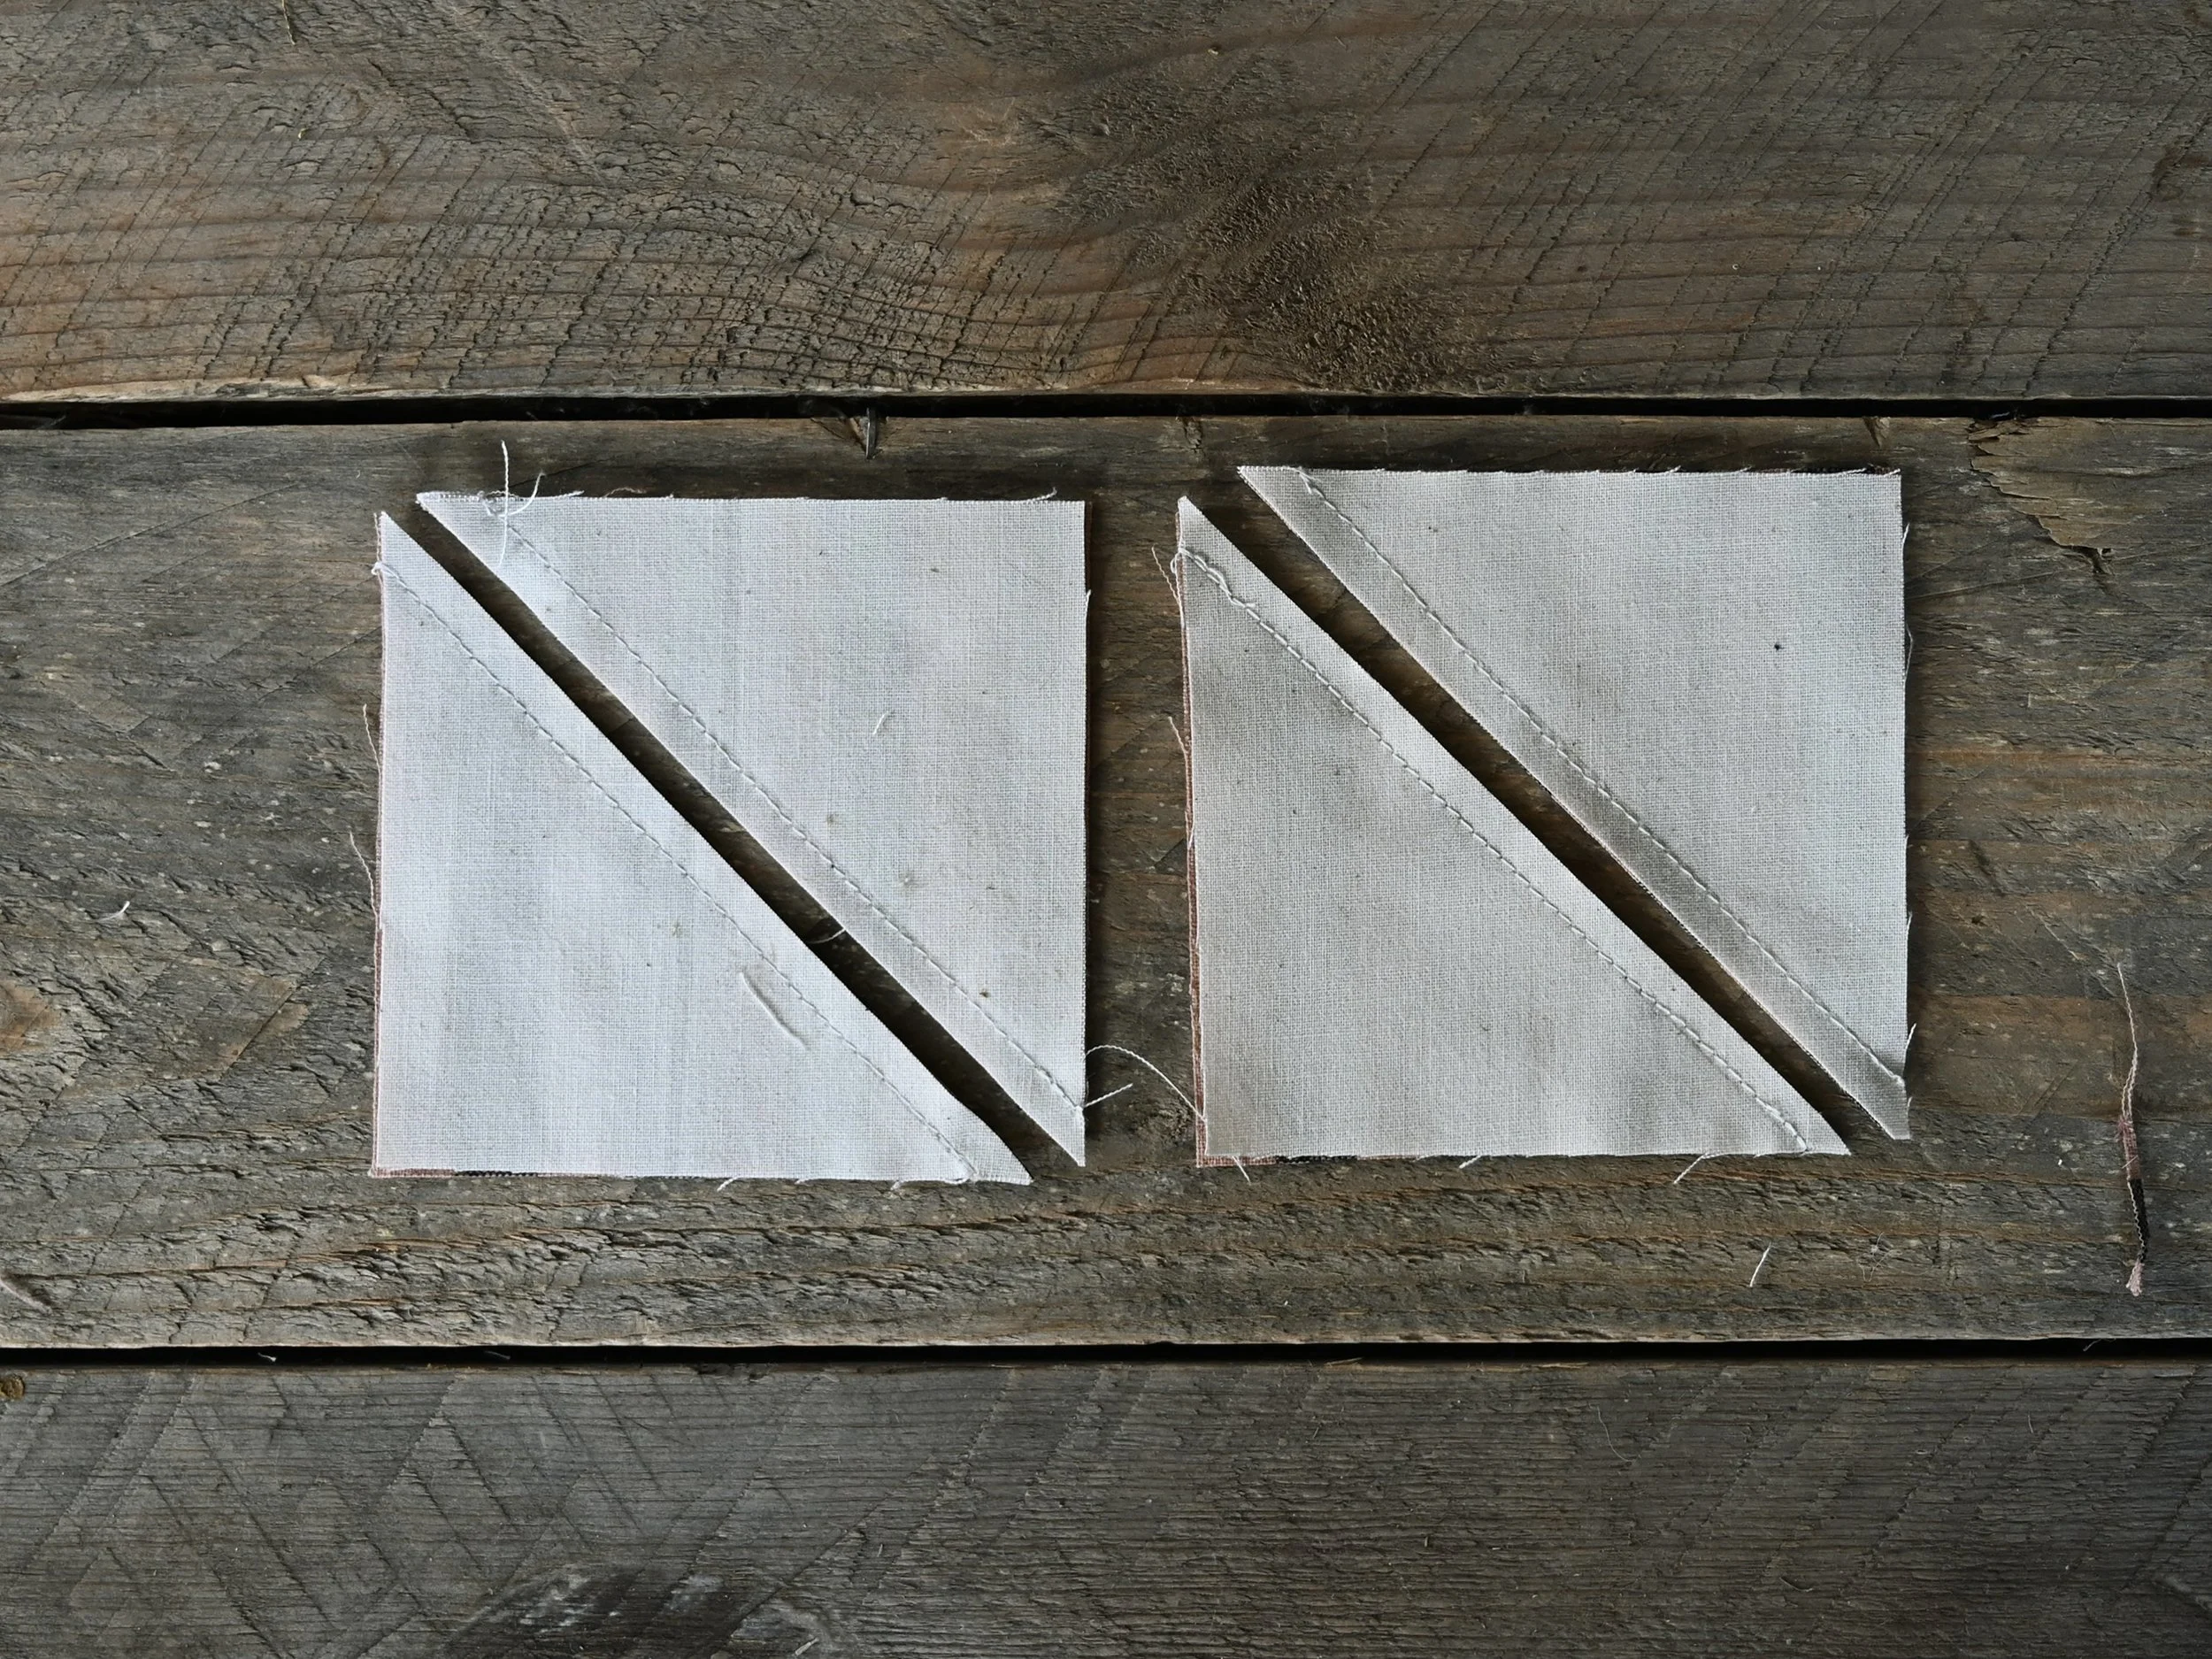
Use a rotary cutter and quilter’s ruler to cut between the sewn lines.
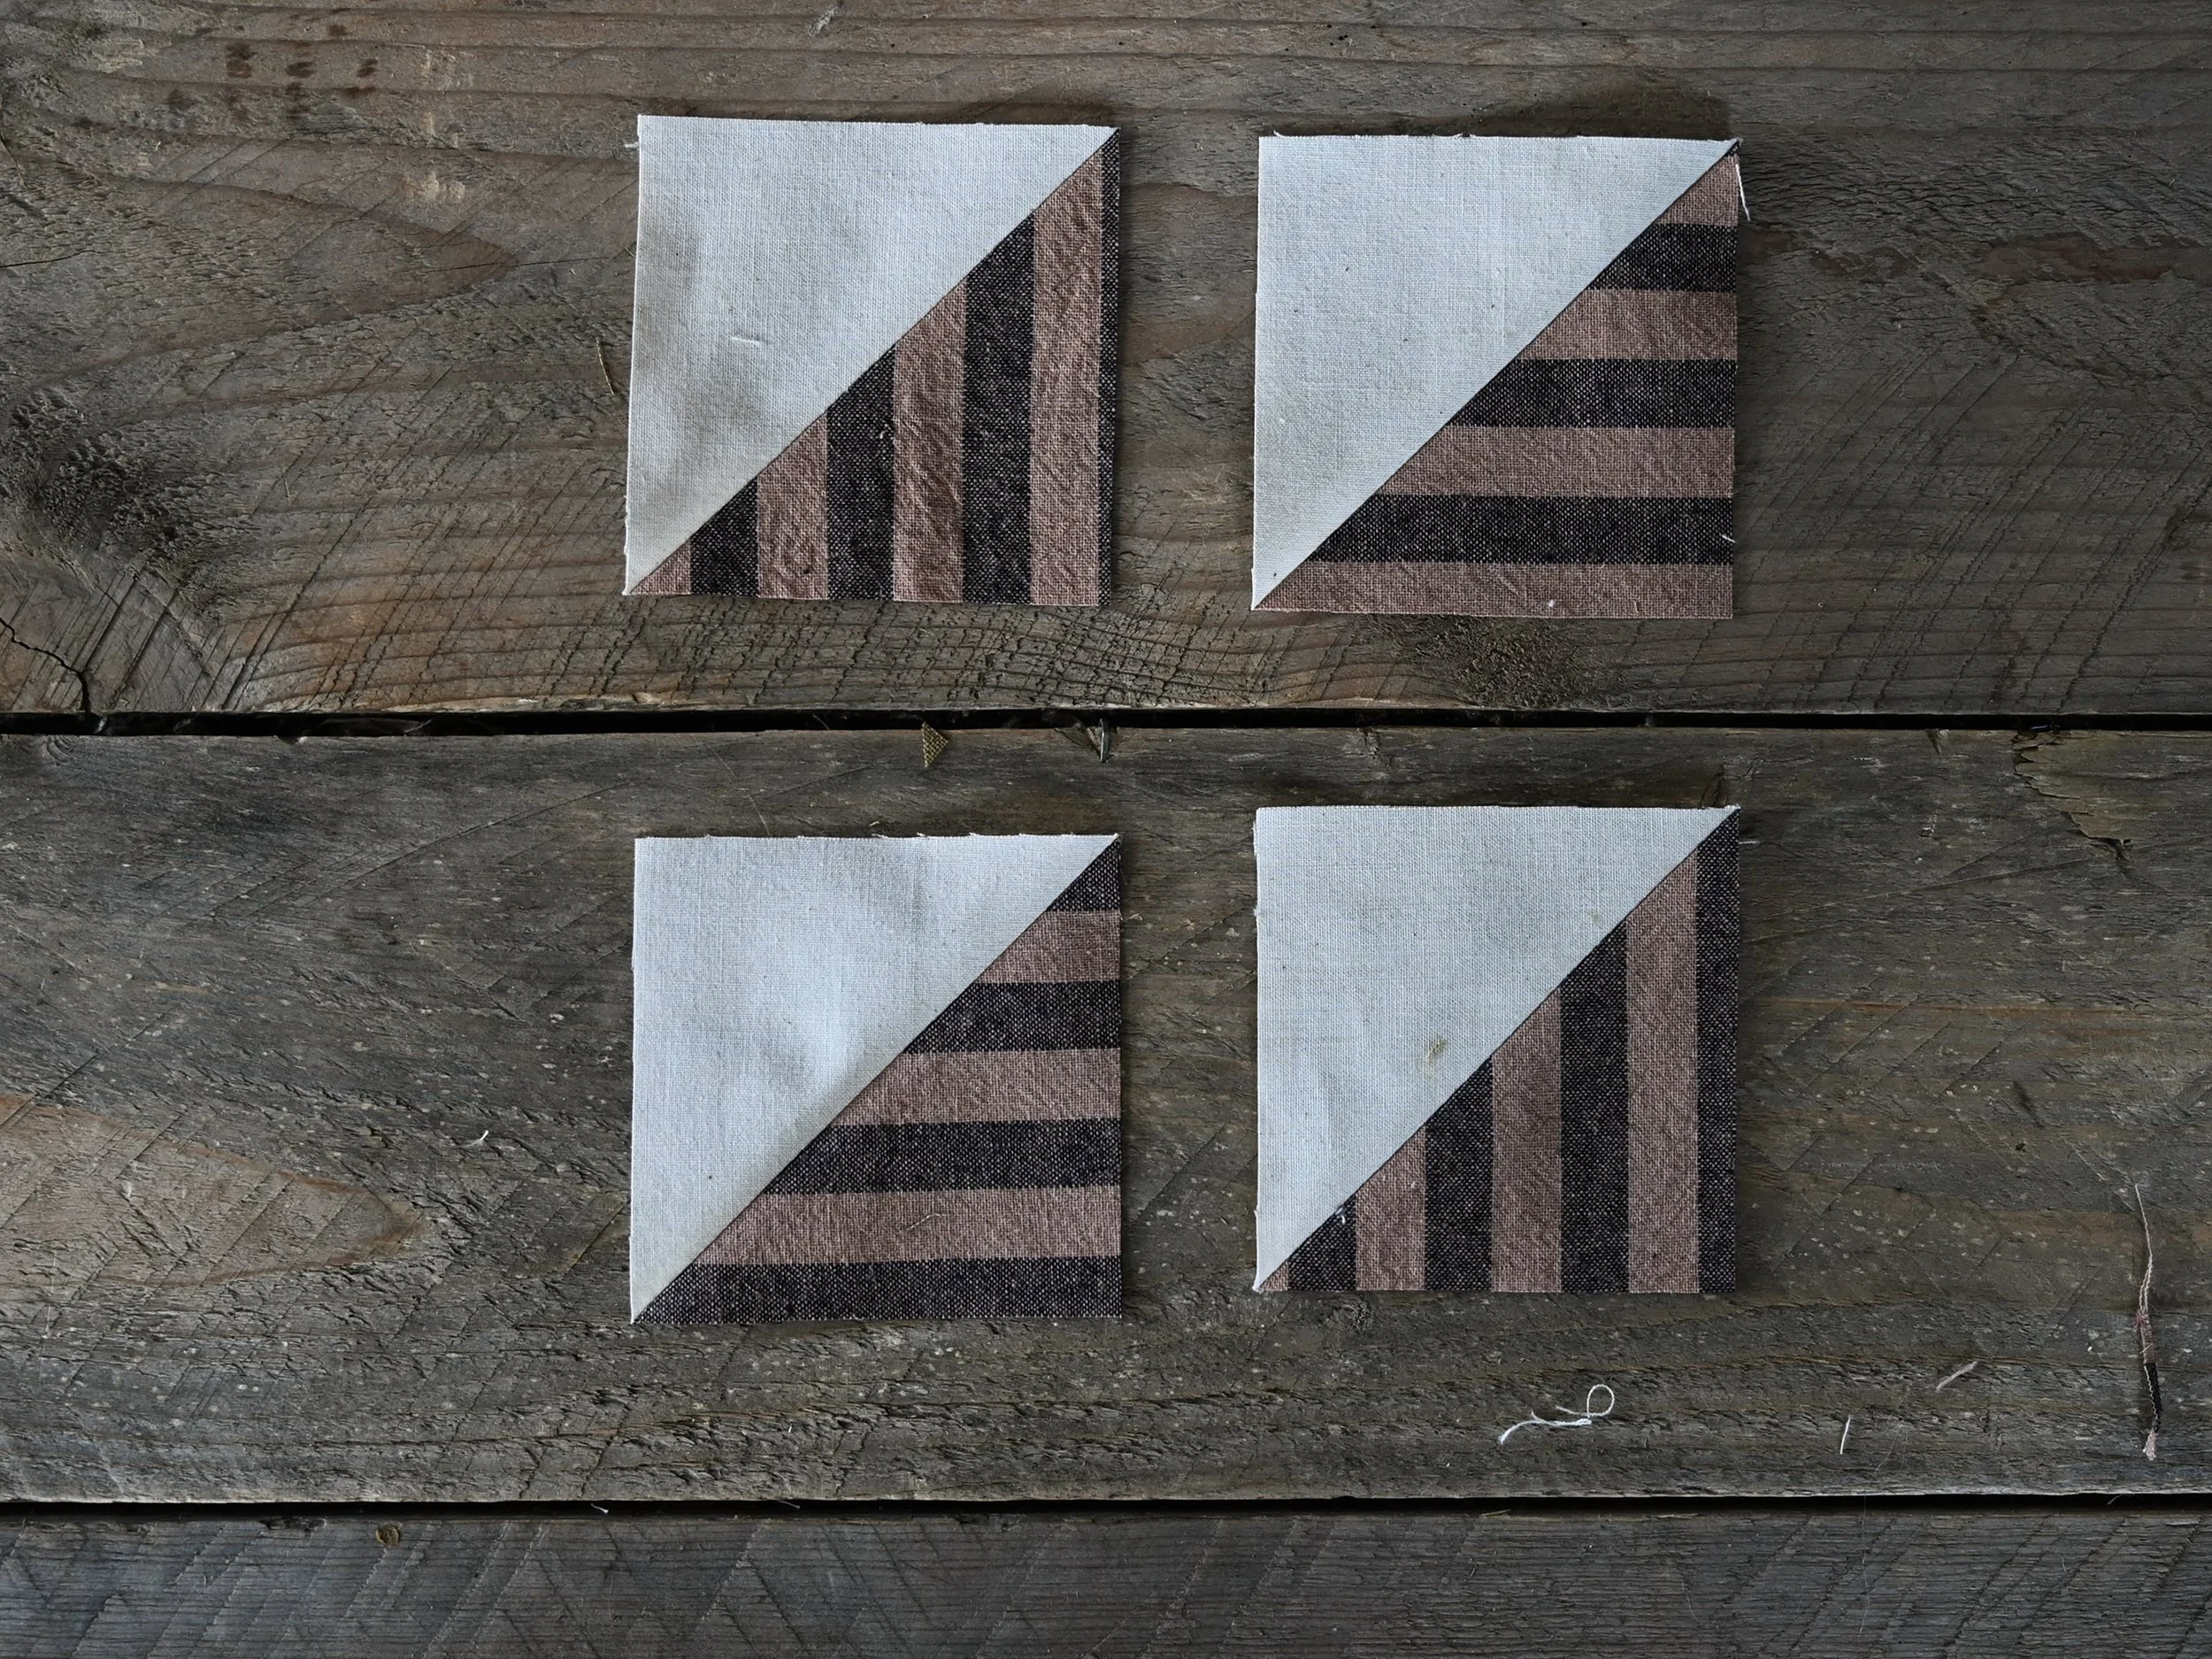
Press open the HST’s and press the seams open or to the side if you prefer. Trim all of the HST’s to 3 1/2” square. I explain how to properly trim HST’s in my HST tutorial.
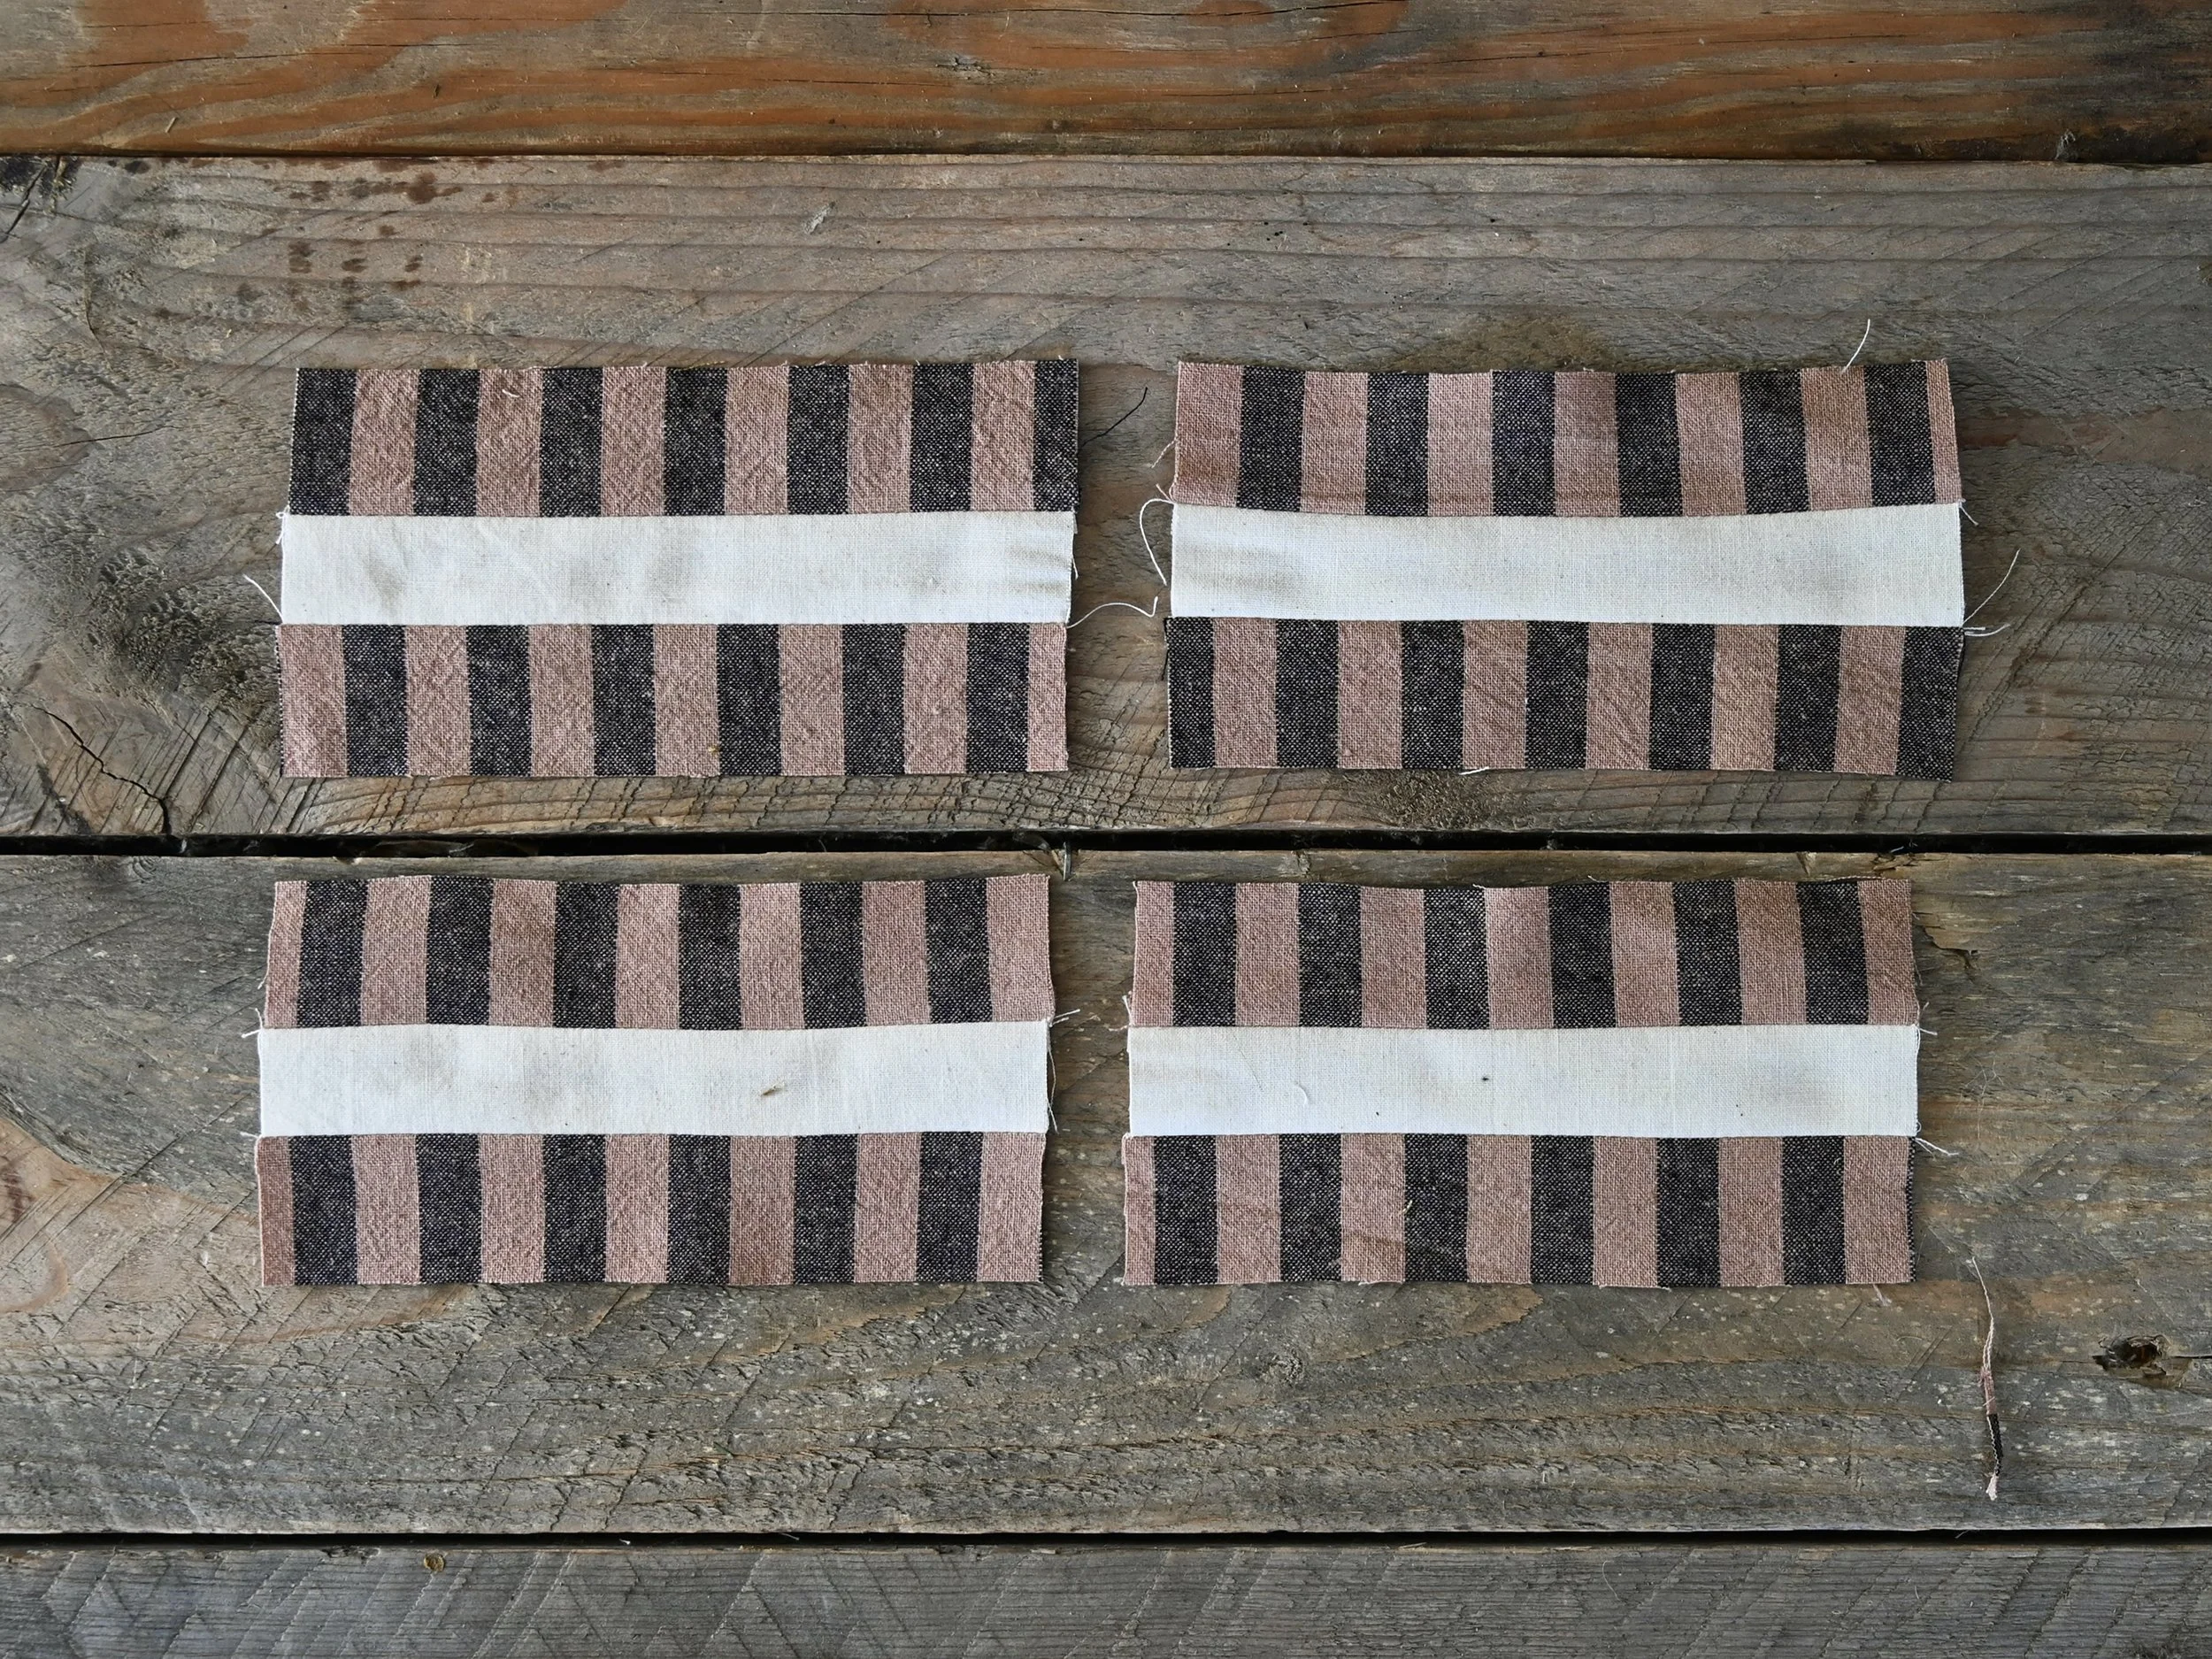
Make the Rectangle Bar Blocks
Gather the 4 white and 8 stiped rectangles you cut for the rectangle bar blocks. Arrange 1 white and 2 striped rectangles on your work surface as shown below and sew them together.
Repeat to make 3 more rectangle bar blocks. Press all the seams open or to the side if you prefer.
Okay, let’s do this! We now have all the pieces we need to make a Star in the Window block. Arrange them on your work surface as shown below.

Sew the pieces into 3 horizontal rows as shown below. Press the seams open or to the side if you prefer.

Now sew the rows together being sure to match the seams by pinning. Press the seams open or to the side if you prefer.

And there you have a fabulous Star in the Window block! If you have any questions please be sure to ask in the comment section below for all to see and reference. Please continue to use the tag #folksamplersewalong on Instagram when sharing your beautiful work so everyone can see. It’s been a real joy to see your blocks coming together!

Somehow we’re already half way through this sew along adventure! So many of you have reached out to express how much fun you’re having and how much you’re learning. I’ve decided to set out a tip jar of sorts this week. If you’re able to make a small donation to support this project, I’d sure appreciate the support. If you’re not in a place to donate, no worries. If Venmo is easier my user name over there is @Sara-Buscaglia-3
Thank you so much to everyone for joining this sew along. I’m sew looking forward to the next 10 weeks and to all the beautiful sampler quilts that are to be!