
Chain and Bar Quilt Block Tutorial
Folk Sampler Sew Along Block 11
I can’t find any information about the origin or age of this quilt block. It’s similar to the Woodland Path block I shared in the first week of our sew along but I think it helps the flow of a sampler quilt to have some blocks that are similar. Today’s Chain and Bar block is made up of Half Square Triangles, Flying Geese, a Quarter Square Triangle, and rectangles. It’s not a difficult block but you will have to work your way through creating the three different foundational shapes.

The finished size of this block is 12” (the unfinished size is 12 1/2”) because that’s what we’re working with in the Folk Sampler Sew Along. As with all quilt blocks you can change the size of the block by changing the size of the pieces within which is explained in this post. In my Flying Geese, Half Square Triangle, and Quarter Square Triangle tutorials (linked in this post) I explain how to make these shapes in any custom size you desire. In the following instructions I will refer to the colors as the ones I chose for my block in the photo above: white, and olive green. As you plan your block, swap my colors for your personal choices. For the natural dyers, the dye recipe I used in my block is olive green.
Finished Block Size 12”
1/4” seam allowance
Cut List
For the HST’s:
Cut 2 white squares: 5 1/2”
Cut 2 olive squares: 5 1/2”
For the Rectangles:
Cut 2 olive rectangles: 3 1/2” x 5”
For the QST:
Cut 1 white square: 4 1/2”
Cut 1 olive square: 4 1/2”
For the Flying Geese:
Cut 2 olive squares: 4 1/2”
Cut 6 white squares: 2 3/4”

Make the HST’s
Gather the 2 white and 2 olive (5 1/2”) squares you cut for the HST’s and head over to my HST tutorial to make a total of 4 HST’s. Begin the tutorial at the part where it says ASSEMBLE. When you get to the TRIM part, trim your 4 HST’s to 5”.

Make the qST block
Gather the white and olive (4 1/2”) squares you cut for the QST block and head over to my QST tutorial to make it. *Please note that you will end up with an extra QST since my method makes 2 at a time. Begin the tutorial at step 2 where it shows you how to draw a diagonal line from diagonal corner to corner. When you get to the TRIM section of the tutorial, trim your QST to 3 1/2”.

Make the Flying Geese
Gather the 2 olive squares, and 6 white squares you cut for the Flying Geese and head over to my Flying Geese tutorial. Cut the 2 larger olive squares in half from diagonal corner to corner twice as shown in the tutorial. Cut the 6 smaller white squares in half from diagonal corner to corner once as shown in the tutorial. Make a total of 6 Flying Geese with these shapes. *Please note that you will have 2 extra olive triangles since this method makes 4 at a time. When you get to the TRIM YOUR GEESE section of the tutorial, trim them to 3 1/2” x 2”.

Assemble the Block
Alrighty, now that we’ve created all of our foundational pieces we can assemble this block! Arrange all the shapes on your work surface as shown below.
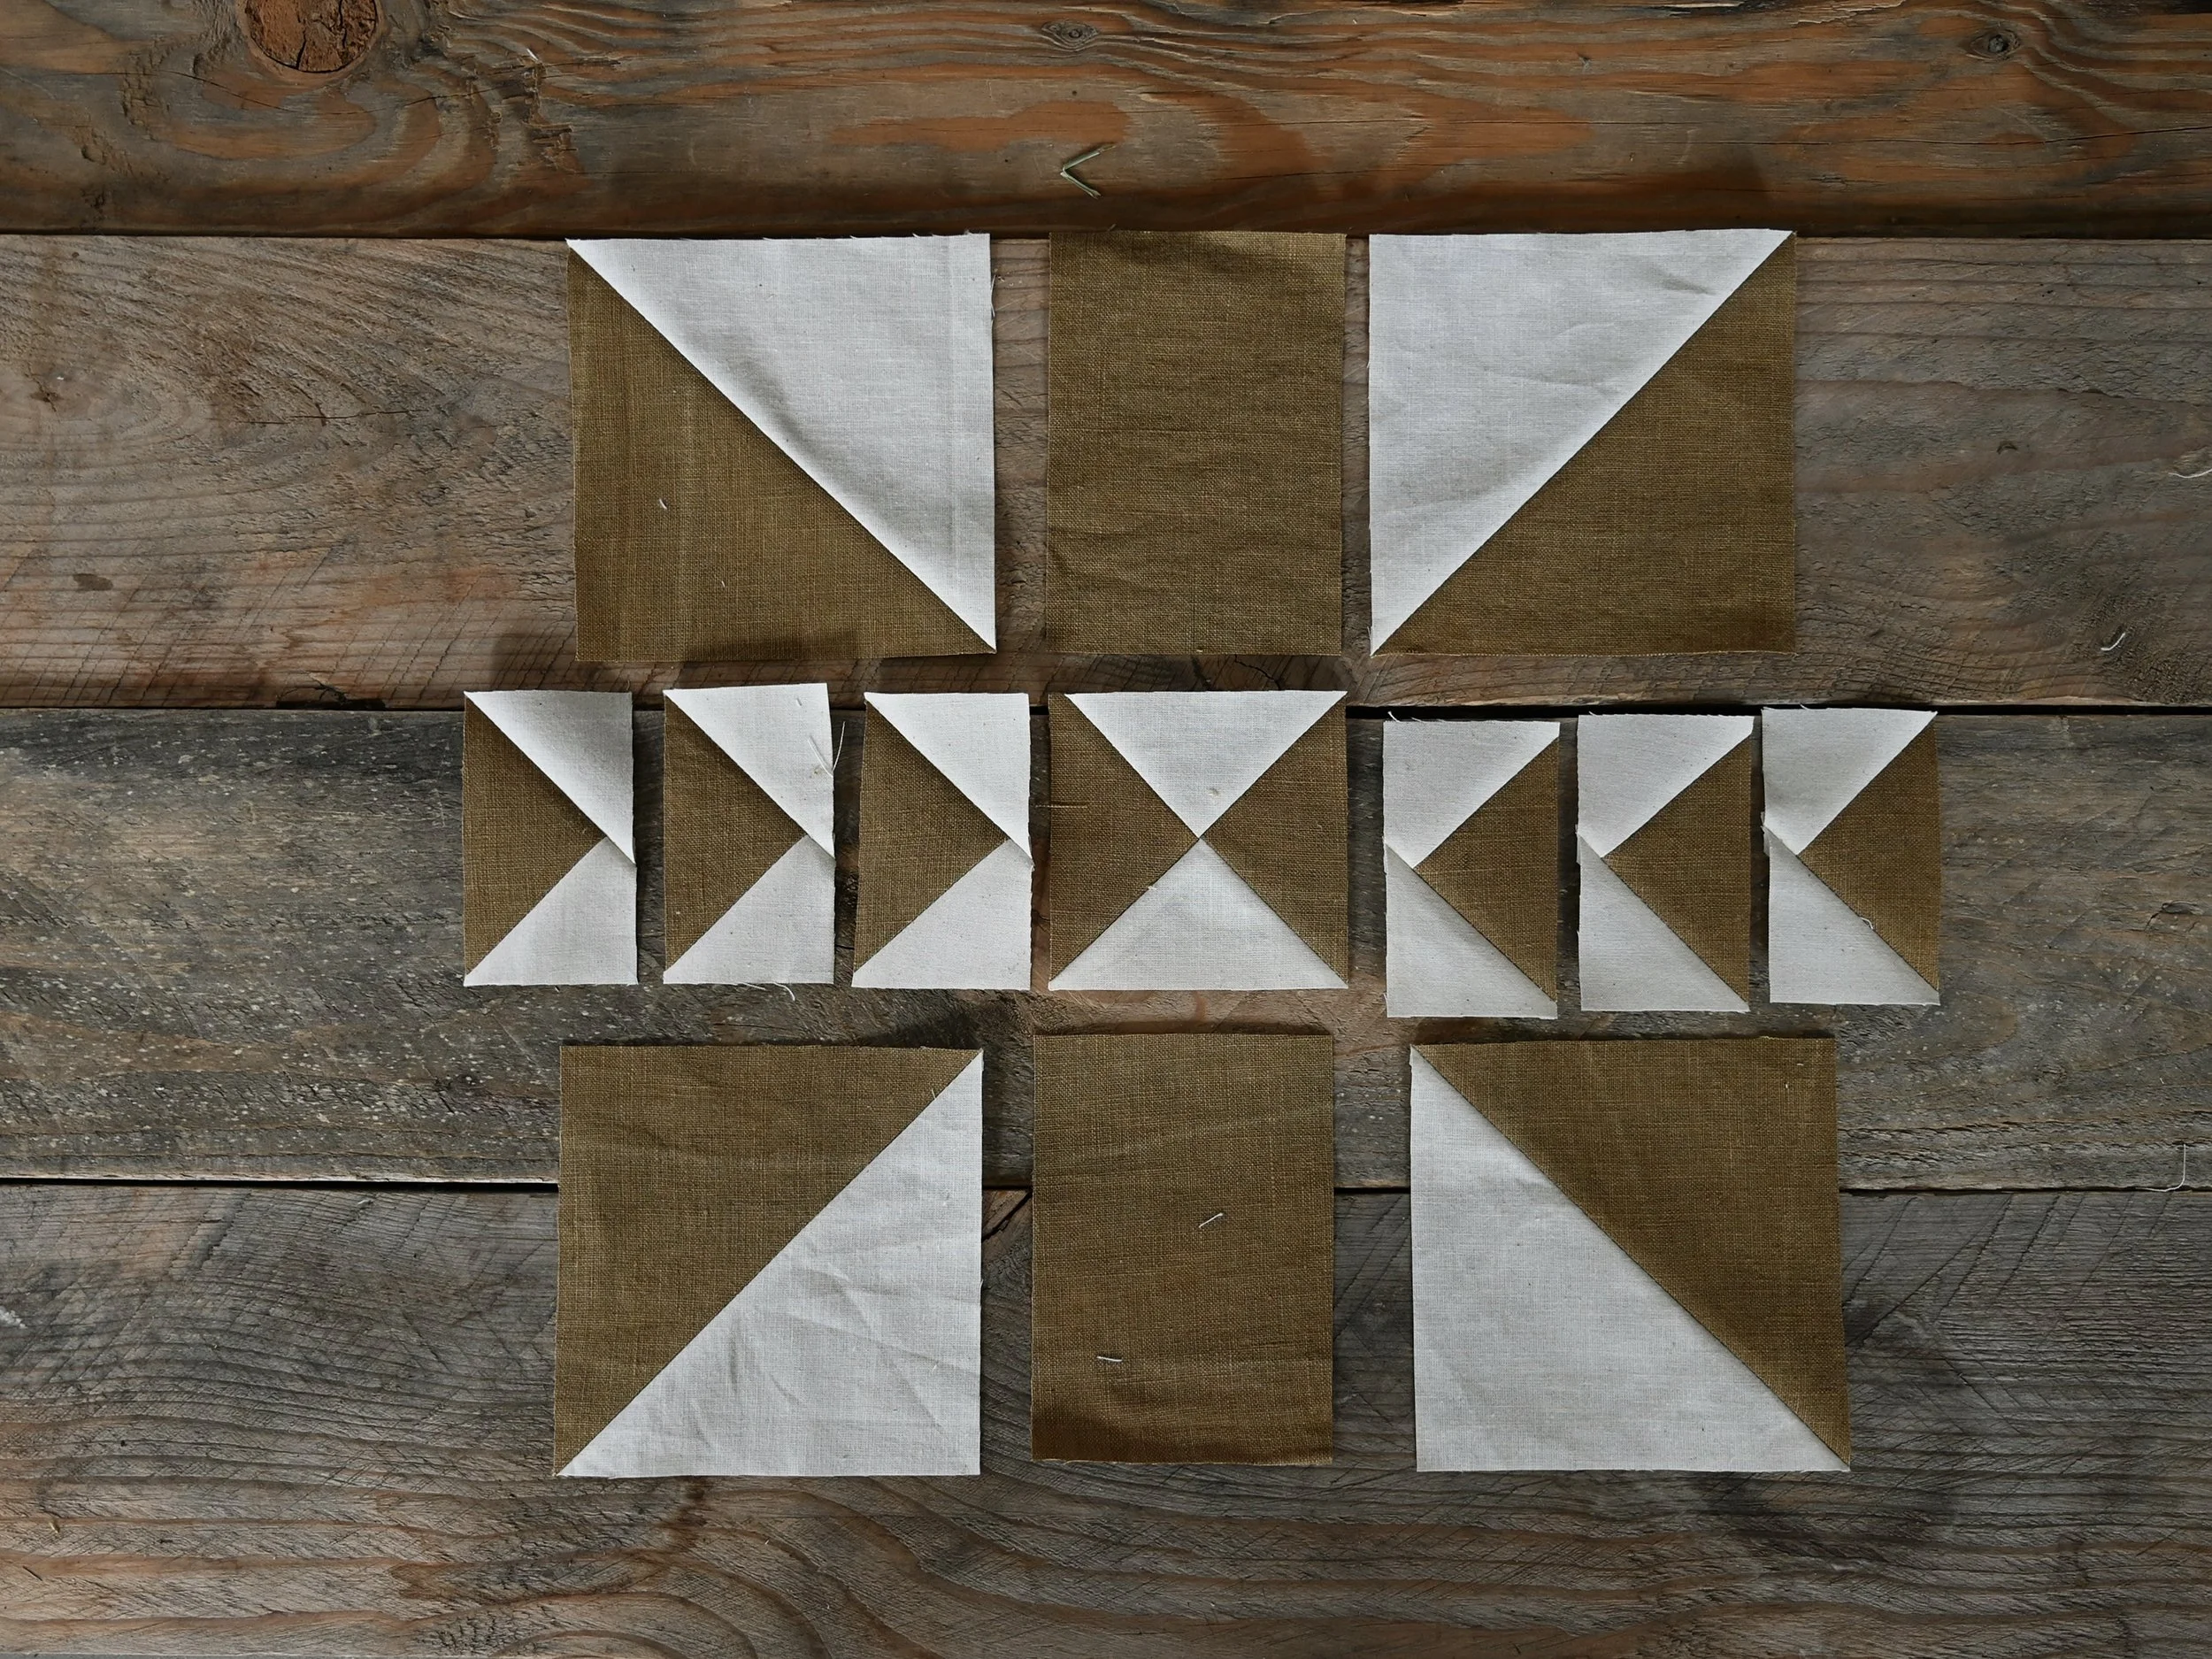
Sew the pieces together to form 3 horizontal rows as shown below. Press the seams open or to the side if you prefer.

Sew the rows together being careful to match the seams by pinning. Press the seams open or to the side if preferred. And there we have a fun Chain and Bar quilt block!

My design wall is filling up with blocks and I’m getting excited to play around with different block arrangements. I’ve been keeping my light and dark blocks separate but I think I’ll put them together to see what that looks like at this point. I made identical blocks for my light and dark palettes this week so I could use up the extra QST and the extra Flying Geese triangles. Isn’t it fun to see how different they react within the light and dark palettes? This might be my favorite block so far and I might have to make an entire quilt from it to explore its possibilities. Gosh, seeing all the blocks multiplying is making me really excited! I’ll see you back here next week for the next block.

If you have any questions please be sure to ask in the comment section below for all to see and reference. Please continue to use the tag #folksamplersewalong on Instagram when sharing your beautiful work so everyone can see. It’s been a real joy to see your blocks coming together!