
Quilt Binding Tutorial
Here’s the long promised quilt binding tutorial! Sorry it’s taken me so long to get to you but life, school, the farm, my knitting obsession, and all the other excuses you know? This is my favorite method which I use it to bind all my quilts. It’s double fold for extra durability, continuous, has mitered corners and is hand stitched in the end—all the good stuff! This tutorial picks up where my 9-patch quilt tutorial left off.

First you will need to trim any extra batting and backing from around the perimeter of your quilt. I like to do this with my rotary cutter and the longest quilting ruler I have. If you don’t have these tools it’s totally fine to do this step with scissors! Try not to trim much—if any—from your quilt top. Line the ruler up with the raw edge of your quilt top and trim off that excess batting and backing:

Next we shall cut our binding strips. I personally cut my strips from selvedge to selvedge rather than on the traditional method of cutting them on the bias. To do this, fold your binding fabric together lengthwise selvedge to selvedge. The amount of strips you need to cut will depend on the perimeter measurement of your quilt and also the length of each strip. To figure this out, first measure around the entire perimeter of your quilt and add about 20 inches to that. My quilt perimeter measures 238 inches plus 20 extra inches means I will need 258 inches of binding strips. My binding fabric is 52 inches wide. Now take your total quilt perimeter plus the 20 extra inches and divide it by the width of your binding fabric. For me this looks like 258” divided by 52” which equals 5, so I need to cut 5 binding strips.
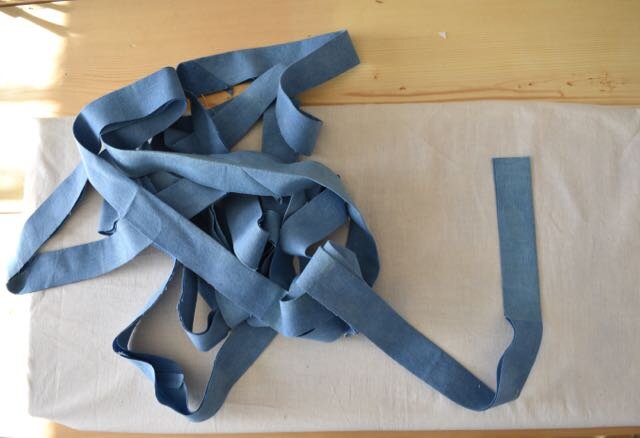
Cut the binding strips to a width of 2.75”. This is my favorite width for double fold binding. Cut the binding strips with a rotary cutter and quilting ruler just like you cut strips to make 9-patch blocks in my 9-patch quilt tutorial. Below you can see the five binding strips I cut which look a little short here because they’re folded in half.

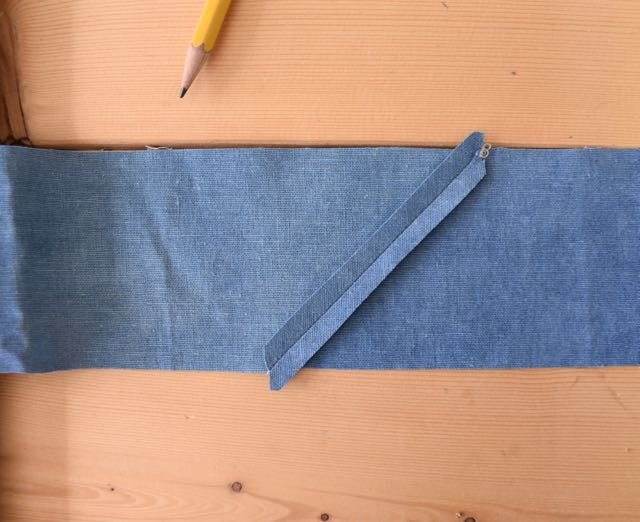
The next step is to make your binding strips into one continuous strip. Begin with two strips and place them perpendicular to each other with the right sides of the fabric facing each other:

Line your strips out just how I have them in the above photo because you will need those overlap intersections. Use a ruler and with a sharp pencil draw a diagonal line from the point where the edges intersect in the bottom left corner to the point where the edges intersect in the top right corner. Try to be exact here to ensure that your binding tape is even. See in the photo below how the pencil line is right in the valley that the two corners make? Now pin this together along the line to keep everything in place and sew directly on the pencil line.

Trim the seam to 1/4”.

Press the seam open. Now repeat the above steps until you have sewn all of your binding strips together into one continuous strip.
Fold the long strip in half raw edge to raw edge with the wrong sides of the fabric together and press the entire length of your binding.

You now have a long binding strip all folded in half lengthwise with the right sides facing out and the seams on the inside. Let’s get this sewn onto the quilt!
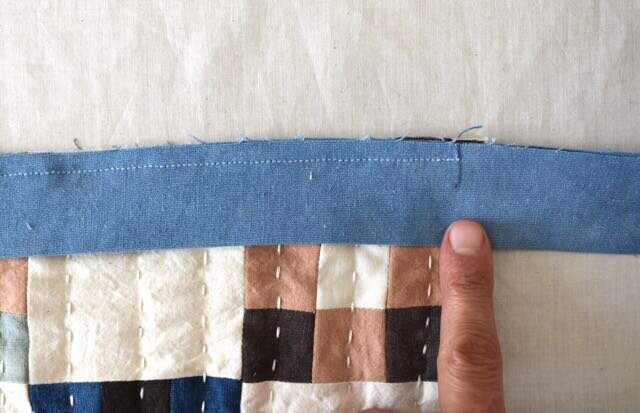
Starting in the middle of one of your quilt sides, place the binding along your quilt edge, raw binding edges to the raw edges of the quilt. Begin pinning the binding to the quilt top keeping the raw edges of everything lined up nicely. Leave about 10 inches of extra binding strip unpinned. In the photo below you can see this ten inches of binding strip which we will not pin down. (In the photo the binding has already been sewn on because I forgot to take a photo of the binding pinned on before I sewed it on.) Begin pinning where you can see my seam in the below photo leaving that extra ten inches unpinned. Continue to pin the strip to the quilt top until you get to the end/corner of the quilt.

Make a mark or place a pin 1/4” before the corner of the quilt. When you sew the binding to the quilt top this mark or pin is where you will end stitching.

Now sew the binding to the quilt top with a 1/4” seam allowance. Begin in the middle of the quilt making sure to leave that ten inches of extra binding un-sewn and make sure the raw edges of your binding and the raw edges of your quilt stay lined up.

Stop sewing at the mark you made 1/4” before the corner edge of your quilt.
To make a beautiful mitered corner first fold that binding strip up and press either with your fingers or very gently with your iron:

Then fold the binding strip back down over itself and perpendicular to the seam you just made. Keep the raw edge of the binding lined up with the raw edge of the quilt and press it:

Pin the binding to the quilt edge just as you did before. Sew the binding down beginning at the very edge and ending again 1/4” before the edge/corner as you did previously.

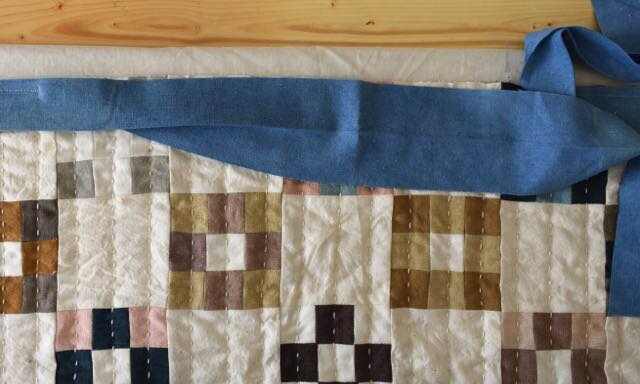
Repeat these steps sewing your binding on and making your mitered corners until you’re nearly back to the point which you began. Leave at least a 10 inch gap between where you began and where you ended. I like to leave a bigger gap around 15 inches because it gives me more room and flexibility in the following step. For now your binding should look like the photo below:

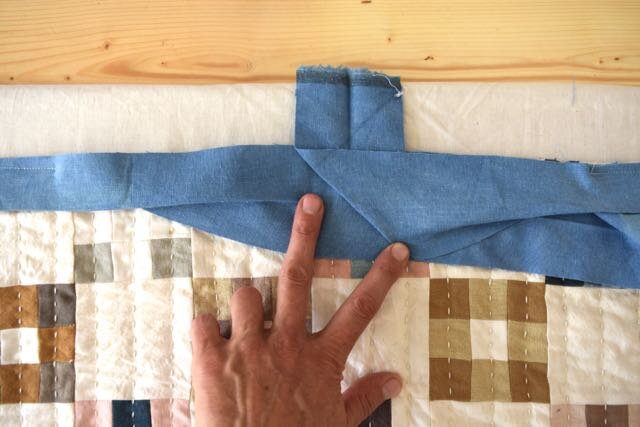
Open out the extra binding strip on the left keeping the top raw edge lined up with the raw edge of the quilt as in the photo below.
Open out the extra binding strip on the right in the same manner, fold it under and up to form a 45 degree angle and place this on top of the left binding strip keeping the top raw binding edge even with the quilt as in the photo below. Make sure that the raw edges of the binding fabric are even with the quilt with no puckers. What we are doing here is fitting the binding to the quilt so we don’t want the binding to be too loose or too tight—it must fit naturally to the quilt edge.
Draw a pencil line onto the bottom binding along that 45 degree angle fold. Sorry for the blurry photo.

Below you can see the line I made on the bottom binding.

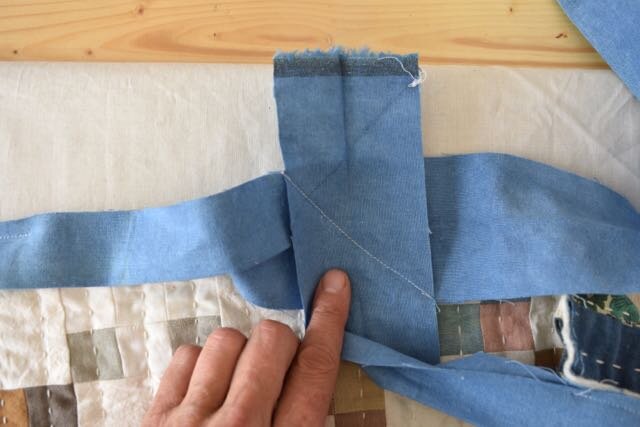
Open out the right side binding now and place the crease of the fold directly on top of and along the pencil line and pin it together along the crease. Carefully take it over to the sewing machine and stitch along the folded crease making sure to begin and end sewing right in the valley where the crease lines meet the corners as earlier in the tutorial.

Below is what it should look like after sewing. Don’t worry about the extra fabric on both binding strips. We will trim it next but actually before you trim the seam, open out the binding to see that it fits the quilt good.
If the binding fits the quilt then trim the seam to 1/4” either with scissors or with a quarter inch ruler and a rotary cutter. After trimming the seam press it open. If the binding does not fit the quilt good then you will need to back up by undoing the seam you made and refit the binding.

Fold the binding back along the original fold and line the two binding raw edges up along the raw edge of the quilt. The binding should fit pretty perfectly—not too loose and not too tight—along the raw edge of the quilt. If you look closely at the photo below you can see where I began stitching the binding to the quilt edge on the right, where I ended sewing the binding to the quilt edge on the left, and finally the diagonal seam that I made to fit the binding to the quilt. Now keeping that raw edge of the binding and the quilt lined up bring the quilt over to the sewing machine and sew the rest of the binding down with a quarter inch seam allowance. You may need to stretch the binding to the quilt a little but it should fit nicely without any puckers.

Alright! Rest assured, the difficult parts are over. Turn the quilt over so that the back is facing up and bring it over to your ironing board. Fold the binding over from the front to the back to enclose the raw edge of the quilt. You don’t want to pull the binding over too far. Pull it over so that it just barely covers the quarter inch seam you made sewing the binding to the front of the quilt. Press and pin the binding down as you go.

I’ll explain the mitered corners in photos:


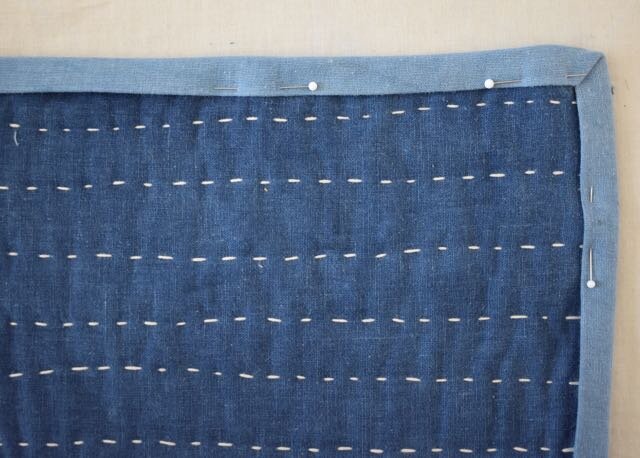
Once the entire perimeter is pressed and pinned down and the corners are neatly mitered it’s time to hand stitch the binding in place. There are a couple ways to stitch the binding down and I’ll show you in photos below how I prefer to do mine. I do not aim for perfect stitches here. Make sure that your stitches do not go through to the other side of the quilt—the stitches should only be visible from the back of the quilt. Use a strong cotton or cotton/silk blend thread that somewhat matches the binding.

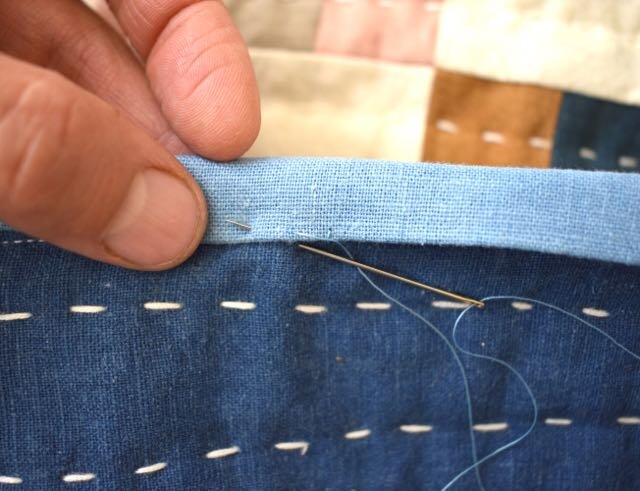
Below you can see the stitches if you look carefully.

And there you have it! I hope you found this tutorial helpful! Please let me know in the comment section below if you have any questions. Also please feel free to share the tutorial and tag me on Instagram posts with the hashtag #farmandfolktutorial so I can see your work and share it. Enjoy!