
Snowballs Quilt Block Tutorial
Sampler Sew Along Block 8
I’m having a hard time officially identifying today’s block so I’m calling it Snowballs. When I sketched it out on graph paper to dissect it I discovered it’s made up of squares, rectangles, snowballs, half snowballs, and quarter snowballs. The snowball shape is a common and versatile shape used either as a standalone block or as a shape within many traditional and modern quilts. I use it often in my quilts as a spacer block. Today’s block was featured in the quilt I used as our quilt sampler example where it caught my eye. I love how the maker of that quilt used it (and a couple other variations of Snowball blocks) in their quilt. The round snowball shapes yield a playful polka dot feeling which works so well amongst the pointy geometric shapes of the other blocks in the quilt. I also love how the original maker decided to use dark purple as the background color for their block. There are 42 total blocks in that quilt and all of them have white backgrounds except for 5. I feel like this block must have been made specifically for a sampler quilt because the block construction wouldn’t make much sense otherwise. Actually, it would make sense if there were plain spacer blocks alternating throughout. Anyway, I think this block is so much fun and when I finished it and put it on the wall with the other blocks it was a happy feeling.

The finished size of the block is 12” (the unfinished size is 12 1/2”) because that’s what we’re working with in the sew along. As with all quilt blocks you can change the size of the block by changing the size of the pieces within. I will post a standalone Snowball block tutorial soon to explain how to make that shape in any custom size. In the following instructions I will refer to the colors as the ones I chose for my block: white and olive green. As you plan your block, swap my colors for your personal choices. For the natural dyers the color recipe I chose for my block in the photo above is olive green.
Finished Block Size 12”
1/4” seam allowance
Cut List
Olive:
Cut 2 squares: 4 1/2”
Cut 4 rectangles: 4 1/2” x 2 1/2”
Cut 2 squares: 2 1/2”
Cut 18 squares: 1 3/4”
White:
Cut 2 squares: 4 1/2”
Cut 4 rectangles: 4 1/2” x 2 1/2”
Cut 2 squares: 2 1/2”

Make the Snowball Shapes
Gather all of the white pieces you cut along with the eighteen 1 3/4” olive squares. These pieces will be used to make the full, half, and quarter snowball shapes.

Use a mechanical pencil (or a sharp pencil) and a ruler to mark each of the small olive squares from diagonal corner to corner as shown below.

Lay out all the white squares and rectangles on your work surface and place the olive green shapes in the corners as shown below. Pin the squares in place and sew the pieces together along the marked pencil line.
Use a ruler and rotary cutter to trim the seam allowances to 1/4”.


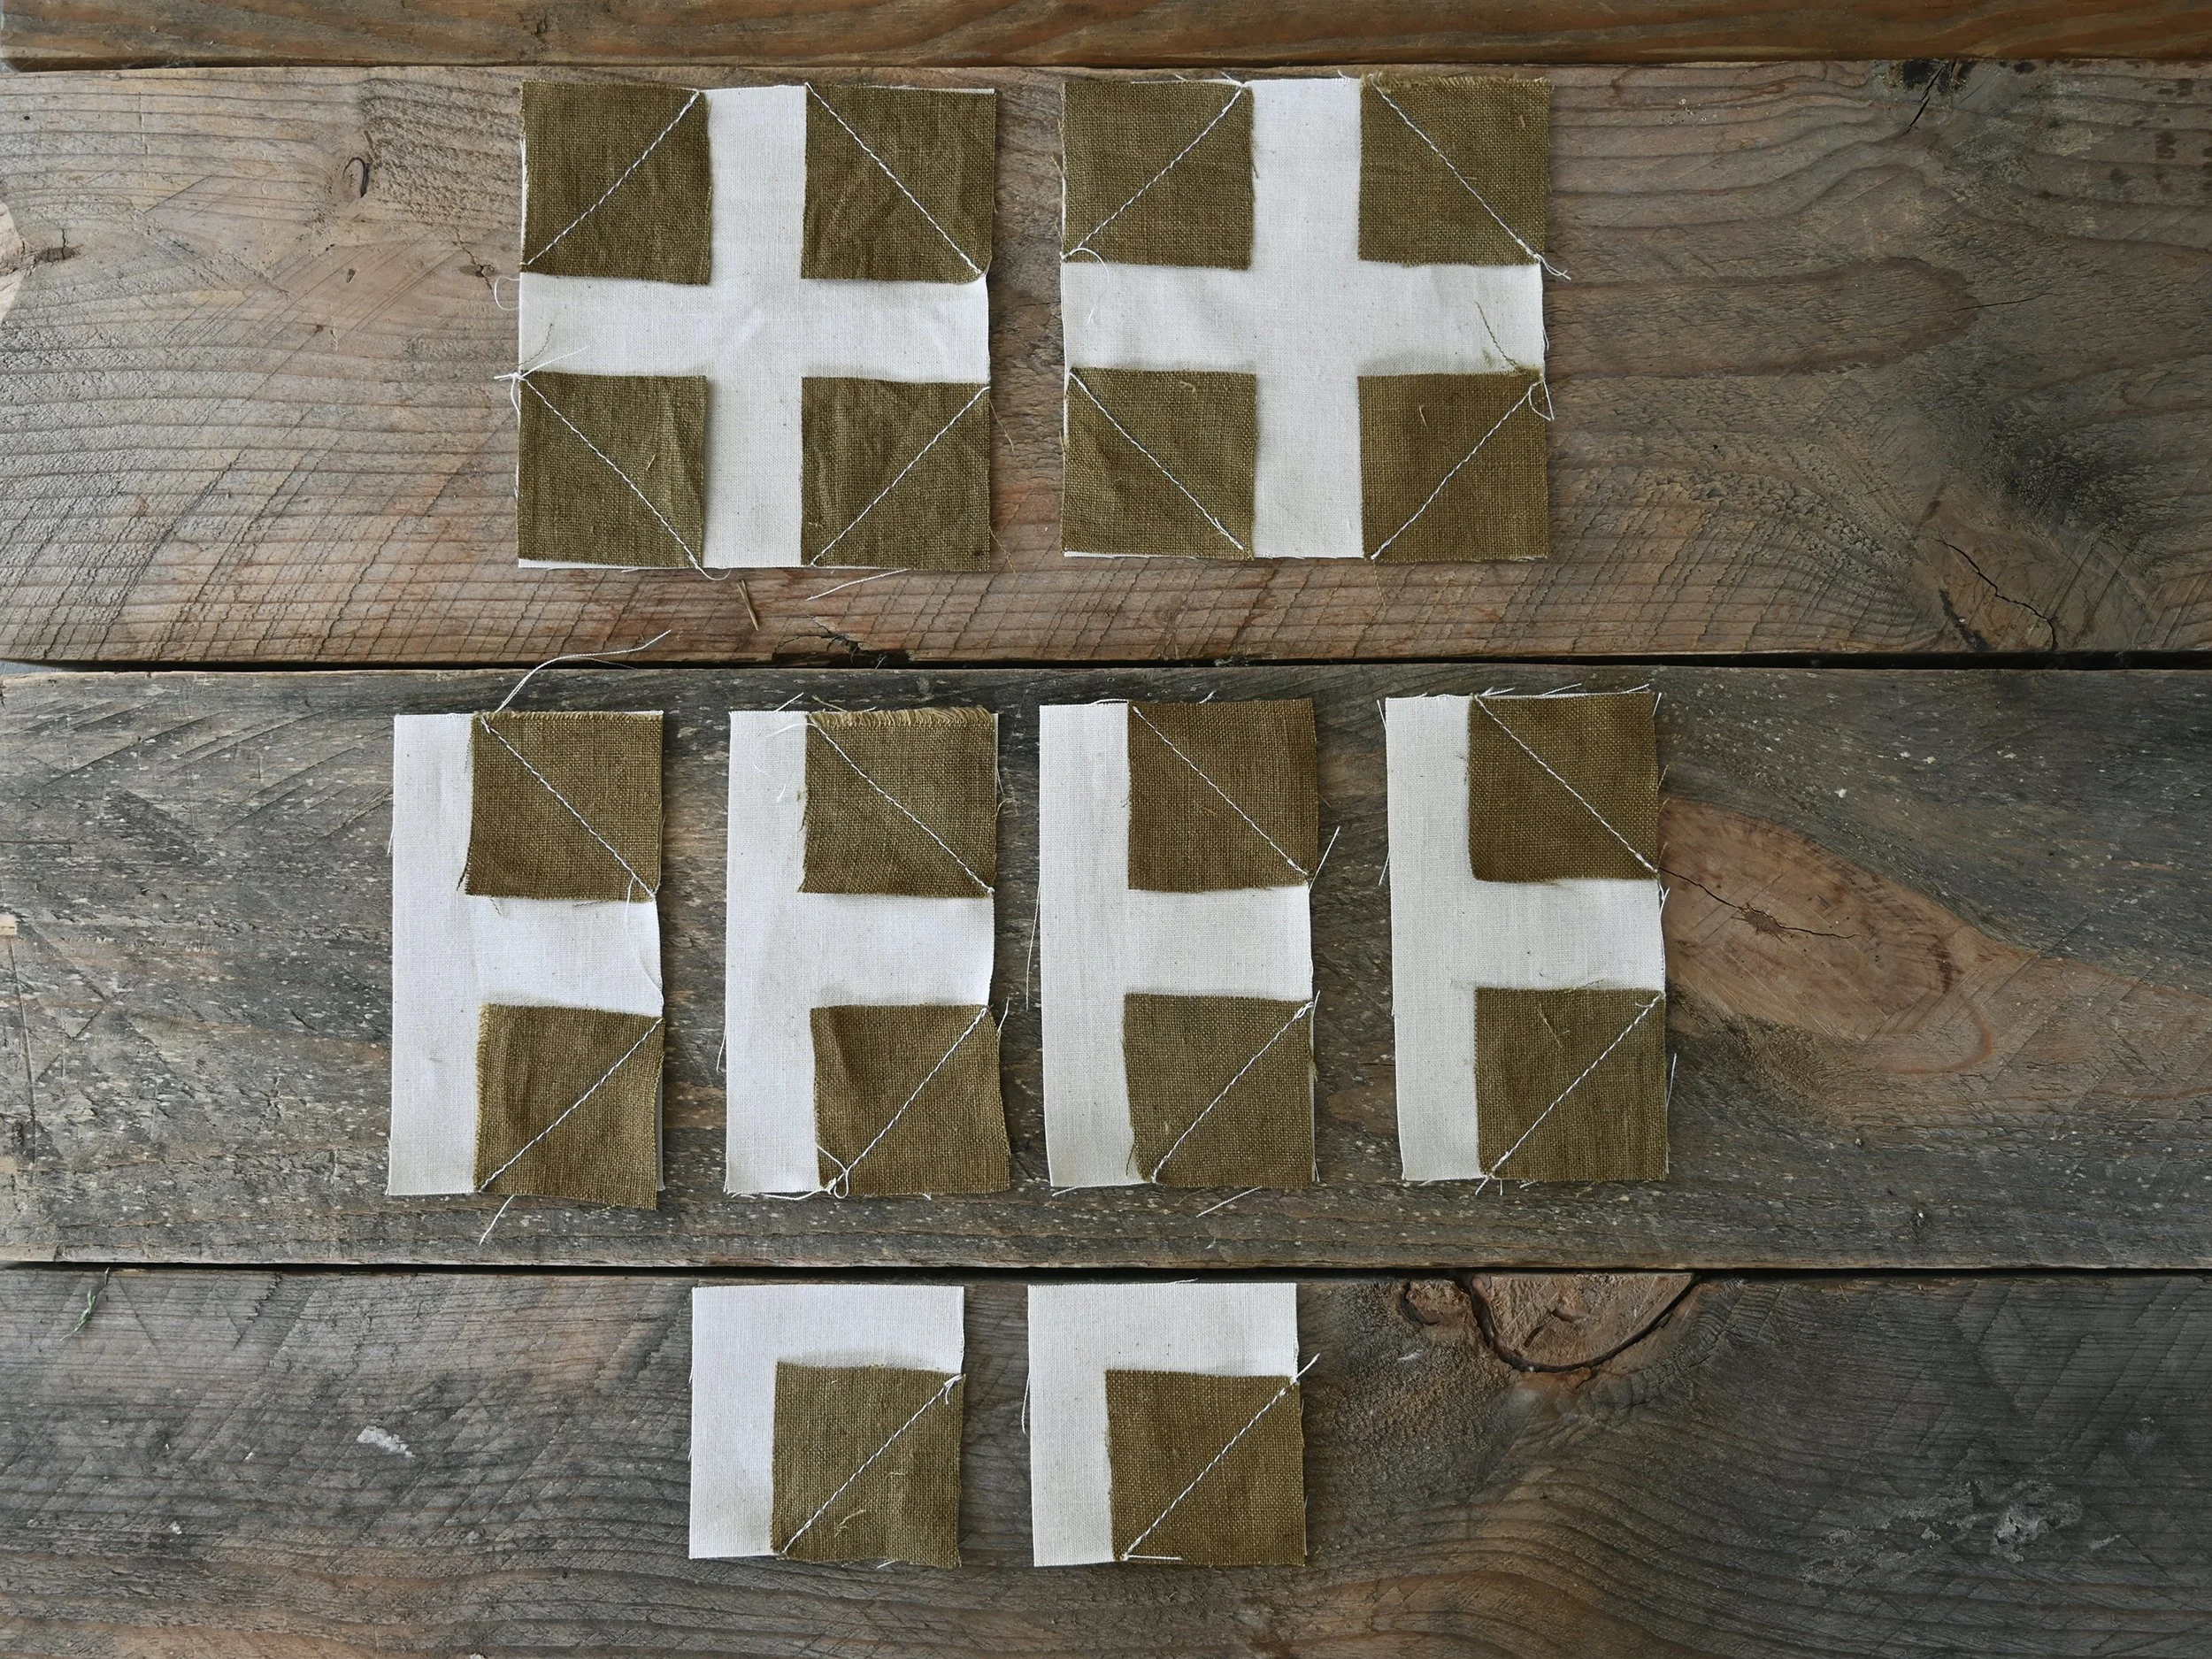
The full, half, and quarter Snowballs after trimming shown below.

Press all the seams open.

Alrighty, now we have all the pieces we need to make a Snowballs block!

Assemble the Block
Lay out the pieces on your work surface as shown below.

Sew the pieces into 4 horizontal rows and press the seams open or to the side if you prefer.

Sew the rows together being sure to match the seams by pinning. Press the seams open or to the side if you prefer. And there we have a fun and playful Snowballs block! I decided to make dark backgrounds for both the light and dark quilt versions I’m working on. One has white snowballs and the other has lilac.


How fun the Snowball blocks make this feel! We will definitely be adding more star and geometric blocks in the weeks to come, but there will also be some more simple blocks like todays to ground the piece. I’m enjoying this project so much and it’s especially a joy to see all the beautiful work you’re coming up with and sharing. Please continue to share and tag me and use the hashtag #folksamplersewalong for all to see on IG. If you have any questions please ask in the comment section below for all to reference. Thanks for joining this block of the week adventure, I’m so glad you’re here! I’ll see you here next week.